Saturday, December 31, 2005

How do you stay creative while traveling?

Any time I’m away from the studio for more than a few days, I loose my momentum on projects. It becomes very frustrating. The solution when I’m at home is to try to make art for at least an hour most days of the week. This Christmas, when we went to visit my family, I brought a large envelope of collage materials, some blank postcards, scissors and archival glue sticks. I was hoping to at least keep that inspired feeling over the holiday. There was an added bonus, my niece likes to do art projects. She is talented and I like to encourage her interest in art.

I was able to get in a little time making collages and talking to my niece about her art projects. My goal was to have about 10 postcards that I could mail to friends instead of Christmas cards. I came home with seven and made a few more today in the studio.

I had an hour to pack some art supplies before we left, so I grabbed some interesting papers, scraps from the drawers of collage materials and some blue wrapping paper with silver stars. I tossed the other supplies into a little box. My postcards are 4.25 x 6 inches, the standard postcard size. I should have planned better and bought postcard stamps before leaving.

I usually start collages with a painted background. Since I didn’t want to take paints I had to either use the creamy white background of the postcard, or layer on papers. You can see I mostly layered the papers. I tried to work quickly and make intuitive decisions.
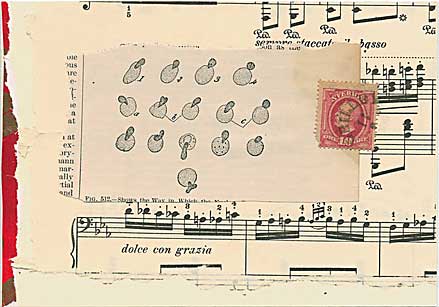
Musical postcard
I love the relationship between the music and the scientific image. This card was boring until I added the thin strip of red wrapping paper at the left.
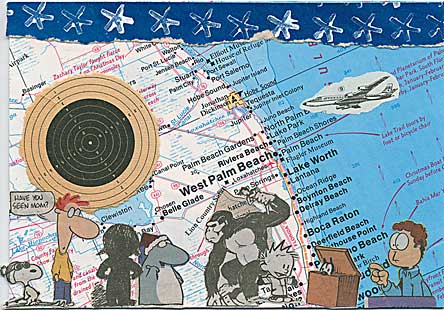
Plane flies into target postcard
I found lots of interesting stuff in the local newspaper. These comic characters remind me of family gatherings.
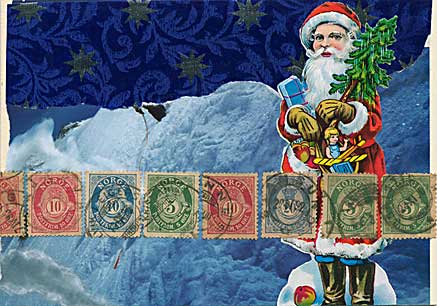
Father Christmas and stamps postcard
This is one of my favorites, it's very pretty and I finally found a use for that old Father Christmas.
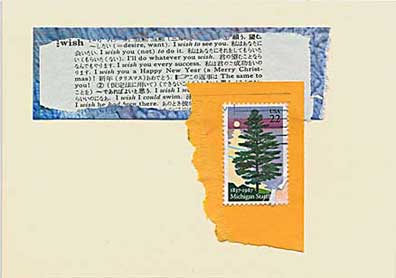
Wish you a happy new year
This one is a failure. I'll keep it around. It seems to need something, maybe it's just unbalanced. If something doesn't look right I play around until I like it better. Maybe eventually something will come to me. If you have an idea for how to fix this one, I'm all ears.

The final result: I did keep some kind of "flow" going over the holiday. I feel eager to get back to work on my current book project. Next time I travel I'll bring colored pencils plus the other stuff. I didn't need half the paper I brought. I could have used the newspaper and discarded magazines from my sister's recycling bin.

Thursday, December 15, 2005

How to be a kid again

I love Christmas lights. They give me a chance to feel like a kid again, with a little of that magical, wondering awe that children feel. Jim and I went out to look at lights in San Carlos and Redwood City. It was lovely to see so many people out, smiling and saying hello to strangers. I like walking along in the dark, or almost dark. I feel that people don’t see me, even when they smile and speak. They see the child in me, enjoying the lights and having a nice time, not the adult who can feel sad at Christmas to remember all the people who aren’t here to celebrate the holidays with us.

I’m learning a new camera and took lots of pictures. Most were terrible. The ones I included are here because they came out okay, and they enhanced my feeling of being a kid as we walked along. (All the images will enlarge if you click on them.)

I liked the simpler decorations for the most part.


Simple Christmas lights

Home made or old looking is a plus with me.

Santa and elves on porch


Snowman with carrot nose

This Grinch was the most humorous site.

Grinch and buddy

Some of the houses were over the top.

Lots of lights, reindeer and tree

And just as we were heading to the car I saw the moon over this big tree.

Misty moon and tree

It was a beautiful ending to the evening.

However you celebrate the season, with lights or singing or dancing, I hope you have a wonderful Holiday with the friends and family that you love.

Friday, December 09, 2005

Collage Demo: Part Two

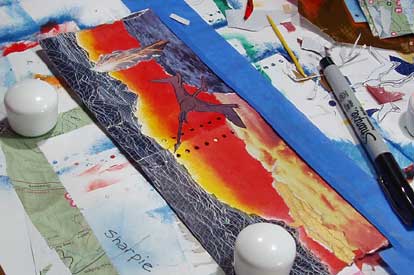
On the pair of pages I’m working on I have already collaged on the ground, sky, clouds and some fire that represents volcanoes. I drew a small pterodactyl on a photo of some rough ground from a magazine and cut it out. When I am sure of the position on the page, I make a few small pencil marks just UNDER the edge of the pterodactyl. When it is glued in place, the pencil marks will be covered.

Spreading PVA on the back of the pterodactyl

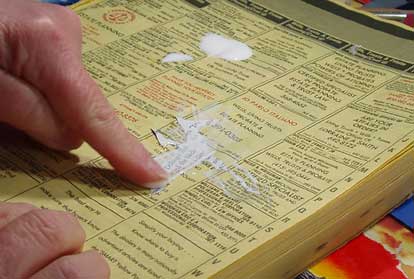
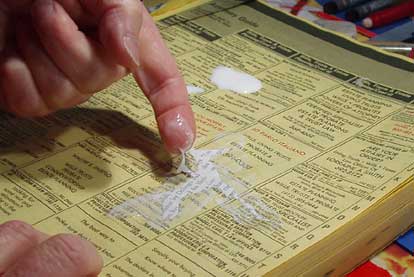
I put a dab of PVA on one corner of a phone book page and use my finger to apply it to the back of the pterodactyl. I try to keep the layer of PVA thin, so it doesn’t seep around the edges too much, but it needs to be thick enough to adhere well.

Lifting the pterodactyl with a fingernail

It’s tricky to pick up complicated shapes. Here I am using my fingernail. A palette knife also helps. I transfer the pterodactyl with glue on it to my book page and press it down. My scale is so small I can push air bubbles out with my finger.

Patting the pterodactyl down with a finger

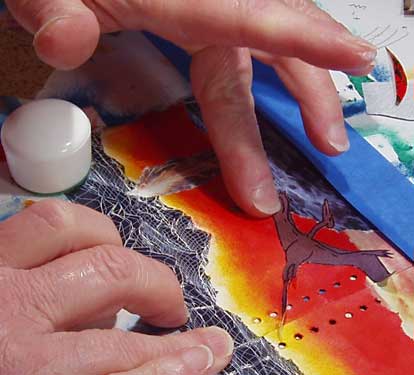
I am pressing down the pterodactyl with my middle finger, you can still see the PVA on my first finger. I have a barely damp cloth and a dry cloth nearby to wipe my fingers if needed. Often a bit of PVA seeps out from the edge and needs to be cleaned up.

Patting away excess glue with damp cloth

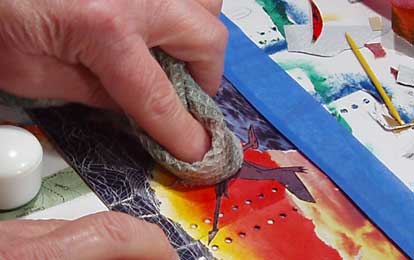
I take the damp cloth and blot off that area quickly, then blot it with a dry cloth. If you’re using magazine images or other soft papers, don’t let them get too damp and don’t rub them. The book page is barely damp at this point. If I still see PVA around the edge of the bit of paper I blot it with my clean fingertip. This either removes it or makes it matt so it doesn’t show.


There are other tutorials on my web site.

Thank you Jim for taking the photos.

Sunday, December 04, 2005

Collage Demo: Part One

The Materials

I started doing collage when I lived near downtown San Jose and walked to San Jose State. There was a goldmine on the streets. I found bits of personal letters, photos, wrappers of all kinds and lots of other good stuff. It seemed to me that there were secret messages lying all over the sidewalk and I wanted to put these secrets into my art.

There are many different ways to do collage. Mine has evolved over the years in response to the materials I had and the effect I was trying to achieve. It works well for very small-scale images. Most of my artist’s books are under 5 inches in any direction. I love small-scale work. It’s intimate and works great in artist’s books, my favorite way to work in paper.

materials used for collage

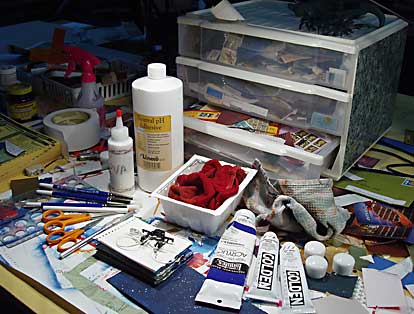
In the image above, you can see in the back my stash of small bits of paper in the drawers. In the middle: (left to right) phone book, small and large bottles of Lineco PVA, damp cloth in tofu tub, dry cloth. In the front: (left to right) some fabric brushes I’m testing, scissors, exacto knife, the stack of pages is the text block for my new book, with some clip-on magnifiers on top, acrylic paints and sewing weights. This image enlarges to show more detail.

I use polyvinyl acetate for glue. (Usually called PVA) This is similar to Elmer’s glue, but better quality. I buy Lineco brand, from a local store, Maggie's , or from Daniel Smith. It is a neutral ph adhesive that leaves my papers looking unchanged by the glue. It will dry up if left uncovered, so I pour some into a smaller container to work from.

There are many opinions about the best adhesive for collage and each product has its staunch fans. Each group claims its favorite glue is the only correct thing to use. I’m not a chemist, so I don’t know about any of this. To my knowledge PVA holds the best, acrylic gel mediums are next, and acrylic mediums have the least holding strength. I have used several different glues in one project with good results. Personally I would say it’s good to try them all and then go with what ever works for your style and personal preferences.

For collage materials I have boxes of old magazines, books that I can cut up, scraps of interesting papers, piles of maps and drawers of small bits of paper I have been collecting for years. I like to work on good quality watercolor paper. Usually I use Arches Hot Press, which is very smooth. I find that the rougher papers have too much texture for small-scale work. I use 90 lb papers for pages I want to fold and sew into books, and 300 lb for pages I treat as boards or for covers. Museum board is also a good book cover material. You can purchase good papers in art supply stores or online at Daniel Smith or Mister Art.

I like to use Golden acrylics to paint my book pages before I start the collage. I do have some Liquetex paints because they are easier to find locally.

I also keep worn out dish clothes in my studio. Because I get the glue on my hands, I like to work with a damp cloth and a dry cloth nearby. A tofu or yogurt tub is handy to keep the damp cloth in so your table doesn’t get wet.

Small scissors and a mat knife are important for cutting out delicate pieces of paper. You might also want some kind of magnifying glasses, colored pencils, and all your other usual art supplies. I also use sewing weights to hold down my pages as I work. If the paper is too buckled for the weights to hold, I might improvise something with tape instead. I use old phone books as pads of scrap paper. Whatever you use, if it has print, make sure it won’t run when wet.

There are other tutorials on my web site.