Sunday, July 30, 2006
Shoot!
This is Lorgnette for a Fish Goddess, ©1997. The materials are silver, brass, sea shells and kelp.
I have been taking a bunch of photos this week. I need some nice ones for the slide show at the Book Arts Jam. Plus I would like to get some more images on my web site. And there is a publication I'm thinking of sending an application to. There are lots of "buts" in there, that you can't see in print. What are they? Well, I do have some photos I could send to the Jam. But I am not totally happy with them. I would love to have more images on my web site, but it's a low priority at this moment. (Although I do have a new gallery planned.) And the publication? It's Lark books, and they "strongly prefer film." I do understand that digital has much less information than film. But it's so hard to get a good shot with film. So today I have been taking digital photos. I'm happy with a few of them. (about 10 out of 100.)
And why don't I "just" get a professional to do the photos? I didn't like the results when I tried several professionals. And the expense for just a few images seems incredibly high to me. I went to the last BABA Sunday meeting on photography and people there seemed to agree, you have to take each book as a different case. People there were suggesting experimenting with each book. And why should I pay someone to do that? Or why should I pay someone to do a bad job. I can do an okay job myself, and I will probably be happier with how the book is presented. I am just not that good at the lighting. I keep trying to get better, and I think I am improving. I definitely understand more now than a few years ago. It's possible I will be rejected from Lark books, for not having slides, for not having good lighting, for not sending whatever the juror likes. But I'll have a bunch of images to put on my web site.
Here's a flickr set with photos of my last set-up. There are comments on the photos, and they will enlarge. (To enlarge: when you're on the main photo page, with "bertmac's photos" at the top, click on the photo. Then click on "all sizes" at the top of the image.)
I did get some good ideas at the BABA meeting:
1. Dark backgrounds can work with enough light on the book/object.
2. Use the digital camera to get all set-up before taking the final shots on film.
3. You can now buy daylight bulbs and daylight film for slides.
4. Take some shots from the back - they may be very interesting and useful.
5. Their rolls of paper were controlled by a chain. I think they have some tension on them, so you can adjust the curve of the paper. This may be the problem with the photo above. The curve might be too sharp instead of gradual.
I also got a lot of good ideas for my set-up here. This is a web site for jewelers, but the photo information is useful, and easy to scale up to larger objects. One thing suggested at ganoksin is using mirrors to reflect light onto your object. This works great for metals, but I'm not sure how it will translate into paper. I need to try that this week.
Now it's time to take photos!
Sunday, July 23, 2006
It's hot, hot, hot!
It's been much hotter than usual here all week. Because we don't have air conditioning, I have been putting off all kinds of things. I wanted to take some photos this week, but the big lights I use are way too hot.
Instead I have been working on my website. I added three older books. They are all in gallery 3 on my web site. Here are direct links:
Duck Dreams
Celestial Navigator
We can see by starlight
I also made a matchbox pinhole camera. Isn't it cute?
I starting taking some notes for the demo at the Book Arts Jam, on October 14th. My goal is to have the demo ready soon, and to put it on my web site as a tutorial. I would also like to get to work on my fern book, which will make use of all these pinhole photos.
Until next time, keep cool!
Wednesday, July 19, 2006
Dirty it up!
I took a fantastic Box Art class with Inge Infante this past spring at the Community School of Music and Art in Mountain View, California.
Here's Inge, inspecting a student's box in the Box Art class. She is a wonderful teacher. Her explanations are clear, she's very helpful when you're stuck, and she doesn't have any "secret" techniques that she won't talk about. She brought in some of her finished boxes to show us how the techniques look. I have seen some of these techniques demoed (sorry, I know that's not a "real" word) before, but hadn't realized how I could make them work for me. Inge's clear instructions and the examples she brought in both helped me to see the potential.
Now I am suddenly so much into transfers and the layering of images. I recently added some collage to a box I made for a little book. I wanted the collage on the box to match the collages in the book. It was hard to go back in time and do the old style collage. I kept thinking "it needs another layer," and "that paper is too clean and white." I view this a a very good thing, and have Inge to thank for it.
Here are some of the students. The class room was a nice space, the other students were great people. I loved all the little tips Inge had for us. The reasonably priced black gesso from Nova Color mentioned in a previous post was one of her tips. Inge is teaching a class at the Community School of Music and Art this fall that will cover boxes (assemblage), collage and altering books.
"Dirty it up" is often what she often says when a work in progress seems boring or isn't going anywhere.
Monday, July 17, 2006
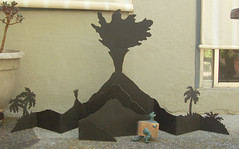
Small progress on huge volcano book
I have finished the hinges for the big volcano book. (If you click on the image you can see it at Flickr. Clicking on "all sizes" will show a larger image) It's so nice to see it standing up. I included the dinosaur book for size comparison. I decided to add some little slopes at the end of the volcano, it seemed to stop too abruptly. I also had to do a number of tests to get the hinges the way I wanted them. My idea was that they should only fold one way, and they should allow a little extra space between the "pages" so I could add collage or metal to the pages.
Here it is, folded and lying on my worktable. I included a roll of painter's tape for scale. It's 32 inches high, and huge. I'm finding it very hard to work on because it's so awkward to turn over or move around.
Next I need to collage on the volcano. I'm not sure how this will look yet, I plan to start tearing out bits of paper and arranging them. I do have a cunning plan, which "cannot fail." (But of course will fail, or will present some other problem.)
I have also been distracted by the pinhole photography. I need a group of plant images for a fern book, and the pinhole effect seems perfect for that. Next I need to figure out how to transfer them. My first attempt wasn't totally successful.
And I volunteered to do a pinhole photography demo at the Book Arts Jam, presented by the Bay Area Book Artists on October 14th. So I'm also experimenting more with handmade cameras. I think the demo will be a matchbox pinhole camera. These seem so easy to make, and they take 35 mm film, which is less expensive to buy and to process. (I have a two-or-three-rolls a week habit at this point.) I am still adding pinhole links to my del.icio.us page, although at a slower pace.
Friday, July 07, 2006
The Hole Story II
Some images from the minty cam:
Both these photos are taken with the minty cam. I like the mysterious, atmospheric effect and the vignetting. The pinhole is .1 mm wide. The exposures were for 4 seconds (as I count) in the shade. I think I might need slightly longer exposures in the shade. Mixed sun and shade seems problematic, with strong white in the sun looking overexposed, and the shade looking underexposed.
Now that I have sort of a sense of what works and what doesn't, I need to figure out how to use these in collage. I think there is plenty of potential. I already know I need some good photos of plants for my fern book.
Plus this has been a really fun week. I did lots of pinhole photography, had fun with my son and enjoyed the time away from the stuff I usually have to do. I had help with the cooking (thank you Jim) and didn't really need to accomplish anything. Time went by way too fast and I'm sad that tomorrow is the last day of the vacation.
Thursday, July 06, 2006
The Hole Story
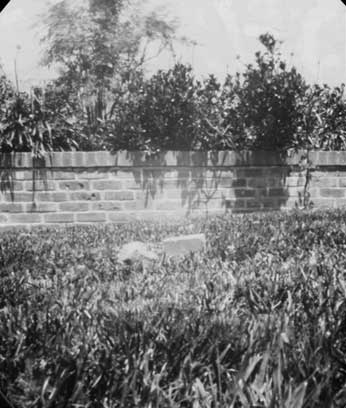
One of my first pinhole images. I took this around 11 am, in full sun, for about 50 seconds, with my oatmeal cam.
I also made a couple of cameras this week.
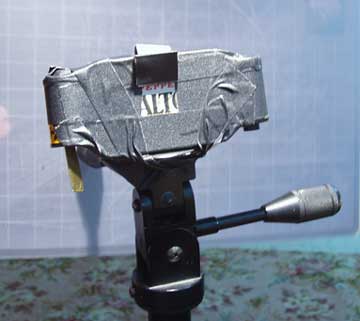
Here is my minty fresh camera.
This is an Altoids tin with a pinhole mounted in the front. I cut a slit on either end, folded down the rough edges the best I could, and taped over the rough edges with gaffer's tape. Then the roll of film is attached to one side, film is pulled through and attached to an empty spool. The camera has to be mummified in tape to block all possible light leeks. The winding mechanism is a piece of brass jammed into the end of the cartridge. You can see it on the lower left part of the camera. The link has a better description of how to make the camera. I took a roll of film on the 4th, trying to capture some fireworks. It was a total failure. Yesterday I took a roll in our yard, which I will take to have developed tomorrow.
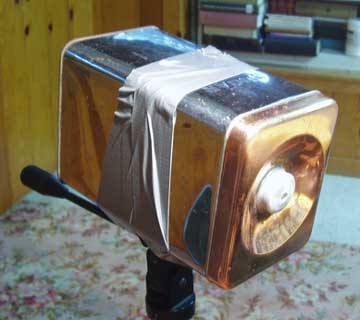
And here is the sugarcam (made from an old sugar cannister). The pinhole is in the handle of the lid. The lid fell off the first time I used it, so now I'm taping it with some electrical tape. I am also taping these cameras to my tripod, or setting them on the ground.
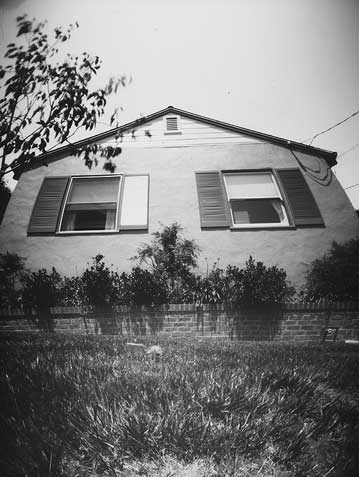
This image of the front of our house was taken with the sugarcam at the same time, and from the same spot, as the pinhole image above. You can see I have to trim the corners a bit to make the paper fit into the sugarcam.
One of my invisible readers pointed out that I should have included links for Freestyle in my last post. And the address for Kaufmann's is 154 W. 25th Ave, San Mateo, California.
I have some pinhole related links on del.icio.us.
And check out my son's flickr photos. He took some really good pinhole images.
Subscribe to:
Posts (Atom)