Saturday, April 25, 2020

new book - A child's introduction to the wonders of space


I think I finished this book in January, but it took awhile to get the photography stuff set up and then to figure out how to use my camera. For a photographer's daughter, and someone who loves pinhole photography, I am certainly bad at using cameras. This time I made notes.


(All these images enlarge) Jim and his younger brother Alan were close when they were kids. Jim has memories of making Alan laugh when he started crying. As they got older, they took different life paths, seeing each other mostly for family gatherings and holiday dinners. Alan died suddenly at 51. When we cleaned out his apartment, we were sad to realize we didn’t know him well.


A year after Alan died their mom went into residential care, so Jim and I cleaned out their childhood home. Among many other things, we found a copy of The Golden Book of Astronomy that had drawings and scribbles in it. Jim has his childhood copy, which is worn but not marked up, so this must have been Alan’s copy. Jim supposes that Alan scribbled in his book so their mom got Jim another copy, and the marked up book went to Alan.


I saved a lot of stuff when we cleared up, mostly old books and comic books. Most of the books were added to a pile of old books I keep for collage. They were mostly geology texts and some field guides. When I was making sketch books and didn’t have enough book board on hand, I thought I would use covers from some of my the old books. I don't normally make altered books, so I thought the covers wouldn't be needed.


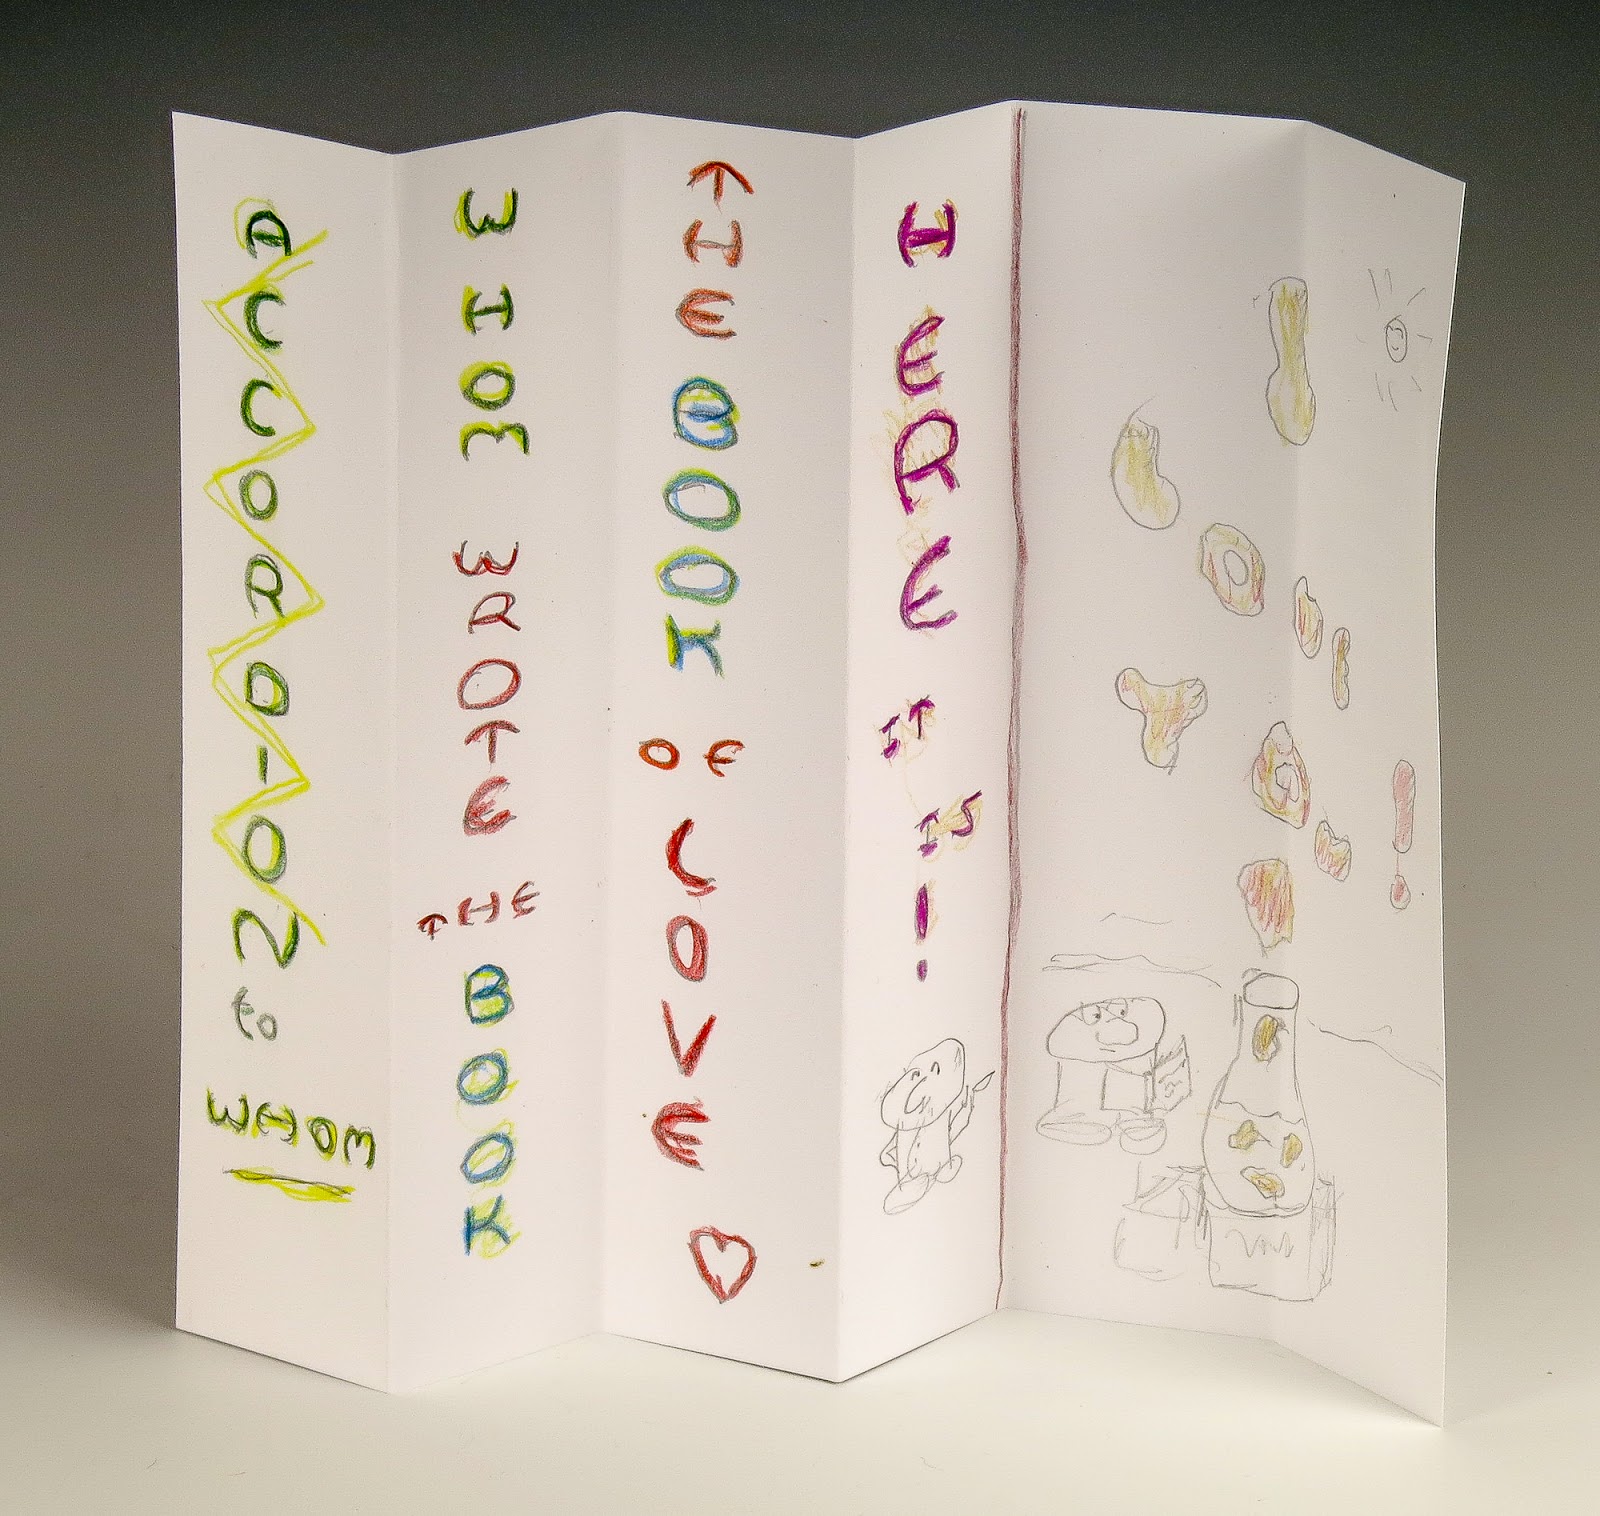
After cutting down the cover of The Golden Book of Astronomy there was a horizontal piece left over that contained the title. Things lie ignored on my work table until I feel I must pick up. Seeing the scrap sitting there day after day made me think the long shape with the title would make a very appealing cover for a book. From there I made pages to fit the cover. The obvious content was the marks Alan made in the book and his old comics. Preserving these childhood marks makes me feel more connected to Alan. Of course I had to add a lot of collage and my own marks to the pages, but the scribbles are all Jim and Alan's.


In this last page it looks like Jim wrote his name and Alan's for Alan to trace over. Under the flap on the right hand page is just a shortened version of this blog post. It ends with "Good bye Alan - we'll look for you on the dark side of the moon."

Thursday, April 09, 2020

The Anti-Hallmark Cards


Jim and I make cards for each other for events like birthdays and anniversaries. Over the years he has often echoed whatever kind of book art project I am working on at the time. Here are a few recent cards. I love their roughness because they are so sincere. I believe that's a "28."


He is heavily influenced by all ameboid styles of art. Note the staples to hold the pop-up in place.


Jim is also an excellent grammarian.


Umpteenth might not be romantic, but we have been together a long time now. Puns and bad jokes are his mainstay.

Saturday, April 04, 2020

Free Mini Book based on Stolen Shadows


One of my goals for this year is to make some free mini zines available on my website. I had hoped to finish the new site and then reveal all these new books. But of course the website is taking longer than expected so I am putting them on my blog for now. This is a four page mini zine you can download and make yourself. Click here to download the pdf. The instructions to make the book are here.

Friday, April 03, 2020

How to make a one sheet book


Here's a little book you can make that shows you how to make the little book. Download the pdf here and print. Or you can use a blank piece of paper and make your own book. Light paper like inexpensive printer paper works well. You also need a bone folder or table knife or even your thumbnail to go over the folds. And you need an exacto knife or a pair of scissors.


If you download and print a book from my blog or website, trim off the white margins. If you are starting with a plain piece of white paper you won't need to trim the margins. Note: all these images will enlarge.


Fold the paper in the long direction. For all these folds I go over the fold with a bone folder to tighten it. Is it necessary? Probably not.


Open the paper out and fold in the short direction.


Fold a short side up to the center fold.


Turn the paper over and fold the other short side to the center. Your paper makes an "M" or "W" if you look at it from the end.


Flatten your paper and find the points where the center fold crosses the folds across the short direction. You want to cut between the two points indicated with red arrows in the photo above. You can cut with a straight edge and exacto knife as I did, or fold the paper in half and cut with scissors. I like to put two small dots at the intersection of the folds to make them easier to see.


Now fold the paper the long way, with the slit you made at the top. Push the two ends together to bow out the center.


Keep pushing the ends toward each other to make an "X."


Find the front cover of your book. Fold all the pages around in a book form. Go over all folds one last time with a bone folder or the handle of a kitchen knife. If your book is blank now you are ready for the fun part.