Showing posts with label Tests. Show all posts

Wednesday, April 17, 2024

Momigami experiments with hand cream


momigami experiment by Judith Hoffman using hand cream
Momigami experiment - left is the momigami, right is the original inkjet print on architect's tracing paper. I was surprised the momigami got much lighter than the original.

Momigami paper on left after rubbing on some acrylic paint or hi-flow inks.

(All images will enlarge - just click on them.) My friend Eileen of the Good Junk Sanctuary came over and showed me how to make momigami. It's something I have been curious about for years. We made a couple of pages while we talked about art and life. She mentioned that you could use hand cream, cooking oil or a gel made from konnyaku powder that is intended for momigami. After Eileen left I experimented with hand cream. (There are lots of videos online for making momigami.) I'm using Vaseline Intensive Care but I think hand creams are pretty much all the same. I first made a number of pieces of momigami from different papers. I let them dry overnight, the hand cream seems to go away. Maybe it's absorbed? The next day I rubbed acrylic paint diluted with glazing medium or hi-flow paint on them. All the paints were very thin, I wanted a transparent layer that wouldn't obscure the original patterns. My goal is to have interesting collage papers. All the papers became softer, and heavily wrinkled of course. The more fragile papers developed little holes and tears along the edges which I love. Rubbing the papers with paint did smooth out most of the physical wrinkles but emphasized the visual texture. At times the backs are almost more beautiful than the fronts.

Momigami experiment by Judith Hoffman on Amazon brown envelope.
The section of a brown envelope on the right with the arrow head is the momigami. The paper had already been printed with some acrylic paints on a gelli plate. The light spots are titan buff, a fairly opaque paint.
Momigami experiment by Judith Hoffman on Amazon brown envelope.
The next day the momigami paper was rubbed with acrylic paint. Not much change, but the more opaque titan buff spots stand out beautifully from the ground. Hard to see the effect in the photo. 
Momigami experiment by Judith Hoffman on architect's tracing paper printed with acrylic paints on a gelli plate
The momigami piece is on the right, the original paper was printed on the gelli plate. I was surprised at how much lighter it became. This is also architect's tracing paper. It's very tough. 

Momigami paper painted with acrylic paints to bring out texture.
I painted some thin blues and sepia toned paints over the momigami sample. 
Momigami on found poetry magazine pages by Judith Hoffman
These two pages came from a magazine. The small figure on the right looks particularly good for collage. 

momigami on magazine pages then painted with various acrylic paints by Judith Hoffman
The pages were then painted with blue and golden brown acrylic paints.

Momigami on found magazine pages by Judith Hoffman
I like the network of lines caused by paint sinking into the wrinkles. These will make inspiring collage materials.

Momigami on gardening magazine page by Judith Hoffman
On the left - momigami on a gardening magazine pages. The ink came off the page and smeared  around some, making my hands inky and the page look dirty. 

Momigami page that was so fragile I tried to adhere it to a piece of light tracing paper.
This was another gardening magazine page that was fragile. To strengthen it I tried to coat it with mat medium on a gelli plate. The paper stuck to the plate so I let it dry then coated it with more mat medium and laid a piece of architect's tracing paper on top. When that was dry I was able to peel the whole sheet off. What I have is some beautifully grungy text and plants. 

Bits of momigamied paper, coated with various acrylic paints to add some color in the cracks by Judith Hoffman
Bits of a page that fell apart. I love the cracks and the subtle colors. 

The back of previous bits of collage papers, the backs are often as nice as the fronts, by Judith Hoffman
The backs of the previous bits of paper. The visual textures and colors are lovely. 

Wednesday, February 28, 2024

Testing papers for transparency


transparency tests Judith Hoffman
Transparency tests. The tests are laid on a piece of black and a piece of white paper. Each is coated with Golden mat medium front and back up to about the halfway point. The papers are: 1. An unknown paper recommended, but discontinued. I have a stack. 2. Calligraphy paper. 3. Abaca from Talas. 4. Wet strength tissue. 5. Architect's tracing paper (Dick Blick calls it Canary Sketching and Tracing.) 6. White Kozo from Hiromi. 7. An old pad of forms used for dispatching or tracing trains. 8. Colors of the Rainbow tissue paper. (the color is Kraft) Drawings on #1 thru 6 are with .005 micron black. #7 and 8 are with 01 Microns. The image will enlarge.

 I like to layer papers when I collage, I want the papers to be somewhat transparent or translucent. My drawings are often done on architect's tracing paper.  I coat it with Golden mat medium to make sure the ink doesn't smear in the collage process. Then I collage the drawing to the substrate. The mat medium does help to make the papers translucent. 


Transparency test on color of the rainbow paper by Judith Hoffman
Transparency test. Colors of the rainbow tissue paper in soft ivory. The figure was drawn on the paper, coated with mat medium, cut out and collaged to eco-dyed paper. The soft ivory pretty closely matches the substrate paper. The brand Colors of the Rainbow is archival and comes in many colors. The paper is not strong when wet.

I have been testing papers lately, looking for other fairly transparent papers in tones I like. I tested all the likely looking papers I could find in my studio. After drawing on each sample I coated it front and back with the mat medium. Below are some drawings and collages I did to further test some of the papers I liked.

Transparency test on old pad of train routing paper.
Old train dispatch or routing paper with drawing. Coated with  mat medium, cut out and collaged to eco-dyed substrate. I don't really know how to describe this pad. It's clearly associated with trains. I would love to find more, but I assume it's not archival. 

transparency test on Abaca paper with drawing coated with mat medium  by Judith Hoffman
The figure was drawn on Abaca paper from Talas. I believe it's 9 gsm. This is the thinnest paper I tested. It works very well, although it's a little hard to drawn on. It's also my favorite for having the paper disappear. I think it would be beautiful for mark making.

All these tests were inspired by Sally Hirst. She has a blog post here about making papers transparent. And a YouTube video here. Her process is different from mine - she spritzes her papers before coating with medium. And she uses a different medium. Sally does test an even thinner Abaca which has to be ordered from Etsy. I found that too thin to draw on, but it would be great for mark making.

Sunday, August 07, 2022

A new kind of dip pen

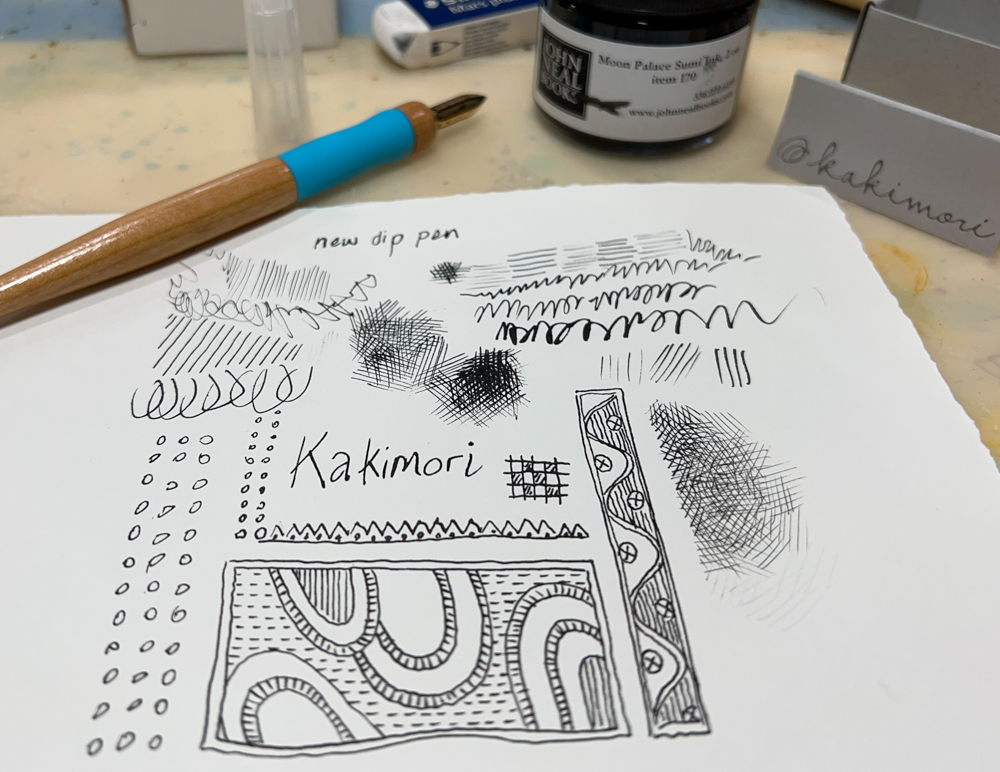
Kakimori dip pen test. I dipped the nib twice to get all these doodles. That's a lot of ink!

 Recently I saw a post on Jane Blundell's blog about a new dip pen. Of course I had to buy one. It came this week and I have played with it a bit. I do like it. I would say it's equivalent to a US medium. In the detail photo you can see the tip is not sharp. There is a stainless steel version that is supposed to be slightly finer. One of its strong points is the amount of ink it holds. I used sumi ink for my test. It seemed to cake up in the grooves after a few dips. Maybe my technique wasn't good. It was very easy to clean with a soft toothbrush. Later I tried Golden hi-flow acrylic. That worked well. Either could be diluted a bit with water. 

Isn't that interesting! A completely new design. There are parallel grooves all around the barrel to hold the ink. 

I paid around $35. at Wet Paint, but ordered some other stuff, so didn't pay shipping. Prices in the US are going up. The best price might be ordering from Japan with some friends, it seems the price is better from Kakimori. They also have nice nib holders, but to save a bit I think a good nib holder would be the Tachikawa. They are pretty easy to find. And they have a plastic cap that protects the nib. It's what I'm using.

Sunday, May 15, 2022

More tests with pen, ink and matte medium

I worry about the unknowable future. A scan from a book that's almost finished. Collage on eco-dyed paper

Last year I suggested d'Atramentis inks for drawing because I was finding them to be waterproof. Recently I have been having more bleeding when I collage drawings down with matte medium. I am not sure what's going on, it may be that I'm using a different architect's tracing paper. I did use up a roll recently. Unfortunately I don't know what the brand was. 

So now I'm trying to find new ways to seal the drawings before collaging them down. I apply matte medium to the back of the image and the substrate, then lay on the drawing. I coat the top of the collage with matte medium, pressing the collage down with the brush. I smooth it out with my finger and wipe away excess matte medium.

Of course I don't want the image to smear as I brush on matte medium or wipe away excess. Talking to my critique group recently about this, they suggested I try varnish or shellac. And then I saw a mention online of applying matte medium to a gelli plate and pressing the collage material on to that. Varnish is thinned with mineral spirits, very bad for lungs, so that's my last resort. Shellac is thinned with alcohol. I don't know if a small amount would be bad, but I do keep the windows open. If I'm using it a lot I set up a fan to pull out air. Matte medium is acrylic, and so for most people maybe not bad to breathe. 
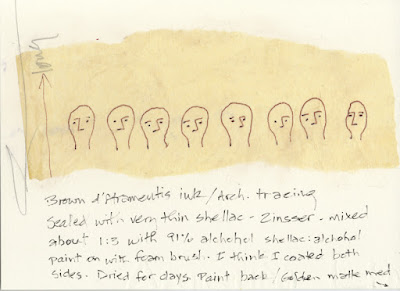
Testing shellac to seal a drawing before collaging.

Above is the shellac test - It's a brown d'Atramentis ink sketch on architect's tracing paper. I sealed it with a thin coat of Zinsser shellac, thinned with 91% alcohol about 3 to 1, alcohol to shellac. 91% alcohol is  apparently flammable. People online say you shouldn't thin shellac with 70% alcohol, there is too much water. I haven't tested that. At this dilution the shellac doesn't change the color of the tracing paper. Undiluted it has a warm yellow color which is very nice when brushed onto paper to make it look old. I let it dry for 3 or 4 days. Then I collaged the sketch in my usual way. The ink does not bleed at all while brushing on shellac or while collaging it. I like the smell of the shellac, but don't know if it's bad to breathe. 


Above is a test with black d'Atramentis ink and a color print from my Epson printer, which uses the Ultrachrome K3 inks. A thin coat of Golden matte medium was applied to both images using the gelli plate. I rolled the matte medium onto the plate, then smoothed on the drawing and peeled it off. It dries pretty fast - in a matter of minutes in my 40% humidity studio. After collaging the images down I rubbed fairly hard on selected areas. There may be a tiny smear at the top of the drawing. And definitely one on the head of the skeleton. (the image will enlarge) But gentle rubbing doesn't produce smears.

Blogger will no longer notify people who have subscribed to blogs. If you would like to know when I publish a new post, send me your email address. In the text just say "subscribe" or some such. I'm not a robot and can understand most English. Send your email to judithDOTzDOThoffmanATgmailDOTcom. I do announce new posts on Facebook but I hardly look at the feed so you may not get notifications from me. 


Thursday, August 12, 2021

Tetrapak Mark Making and Printing Tests


Tetrapak mark making tools test
I always have to make a book and take a photo. Even the funky tests. Single sheet binding, instructions from Keith Smith.

I have been testing a lot of mark making tools on Tetrapak. Above is a little book I made myself. Below are all the tests. Most of the tools I used are in the photos. The paper is Stonehenge, ink is Akua carbon black. Not all the tests printed equally well, but it's information, not beauty that I'm looking for.

Tetrapak mark making test 2021 Judith Hoffman
Fine line applicator with Golden high flow paint. Hard to control, hard to write backwards. Take a while to dry thouroughly.

Tetrapak mark making test 2021 Judith Hoffman
PVA sprayed on with toothbrush, keep it light for a texture. Lots of small spots end up making a dark area.

Tetrapak mark making test 2021 Judith Hoffman
Liquitex clear gesso, center is the tetrapak, right is Blick white acrylic, brushed on and scribbled with brush handle end. I need to play more with the brush handle marks.

Tetrapak mark making test 2021 Judith Hoffman
Utrecht mat medium sprayed on with spray tool. Keep it light to get spots, more spots will hold more ink. Hard to control but I love the bigger spots.

Tetrapak mark making test 2021 Judith Hoffman
Left dark area is an etching tool that scratches many fine lines, the grids are pieces of screening. I couldn't find most of them - the heavy plastic one above was used, also the wire. it's twisted very fine wire. These are embossed into the tetrapak.

Tetrapak mark making test 2021 Judith Hoffman
Staples under aluminum tape on the left and above right, hammered staples on the right.
 If you try this be careful - you don't want to make permanent marks on your rollers. Extra padding is a good idea.
Tetrapak mark making test 2021 Judith Hoffman
Aluminum tape, torn for the two horizontal pieces, crumpled for vertical piece. The long horizontal line is a fold in the tetrapak.
Tetrapak mark making test 2021 Judith Hoffman
Above: screwdriver blade, Below square tubing. Press down hard.
 The screwdriver blade is notched.
Tetrapak mark making test 2021 Judith Hoffman
Left: sand paper scratches, right Wiggle Jiggle writer with scribe taped on.
 It's a kid's fun drawing tool. On Amazon.
Tetrapak mark making test 2021 Judith Hoffman
Marbling comb. On the left I tried brushing on some mat medium. I want to use these in collage. Turns out the Akua dries slowly, but is finally supposed to be waterproof.

Tetrapak mark making test 2021 Judith Hoffman
Left some kind of etching tool - makes many very fine lines. Center: fork, Right: nail set, although maybe not the one in the photo. I think it had a larger circle end.

Tetrapak mark making test 2021 Judith Hoffman
Wheels with spikes. For leather working and sewing. These are hard to ink well. A very soft toothbrush seems best.

Tetrapak mark making test 2021 Judith Hoffman
Papermate ballpoint pen, wheel with spikes.

Tetrapak mark making test 2021 Judith Hoffman
Energel 0.5 pen

Tetrapak mark making test 2021 Judith Hoffman
Left: twisted scribe, right: scalpel

Tetrapak mark making test 2021 Judith Hoffman
Circle test: Left twisted scribe. The five is cut out. Right: nut cracker pick. Easier to draw a circle. I am having trouble adjusting to the different feeling between a pen and the scribes which are very sharp and only really work when I pull them toward me.

Tetrapak mark making test 2021 Judith Hoffman
Left: Jetstream pen .23, nut pick, Right Cork handled scribe. Just as sharp as the twisted scribe but easier on the hand.

Tetrapak mark making test 2021 Judith Hoffman
Uni Jetstream pen .28, Uni Jetstream 3, .38, Pentel energel .5, Papermate 1. They all look about the same when printed. I was hoping for a finer line from the finer tips.

Tetrapak mark making test 2021 Judith Hoffman
Top: wire tool with handle, Bottom: cork handled scribe, trying light and firm pressures.

Tetrapak mark making test 2021 Judith Hoffman
Polymer clay tool with embedded nails. I made this one years ago.

Tetrapak mark making test 2021 Judith Hoffman
Polymer clay tool, point on one end, circle on the other. The circle is like a nail set tool. The point is fairly smooth. I need to test this more.

Protecting the ink from cats
My system to leave the ink on the glass plate. We have a cat, he mostly doesn't walk on the table but he might. I should put a weight on top. They claim the Akua ink doesn't dry on non-porous surfaces, so it can sit out until you use it up.