Showing posts with label Drawing. Show all posts

Tuesday, June 17, 2025

I eat lettuce and milk for breakfast

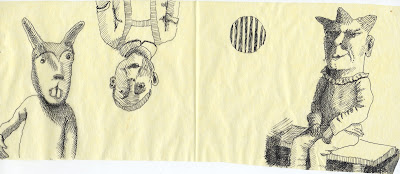
A man on the left looks amazed at a cat on the right. A person with a cat head runs behind them.
A page from my handmade book My dreams defy analysis. ©2024 7.75 x 5.75 x 1 inch (closed).

I am emptying a big bowl of lettuce and milk onto the ground behind our house. I was eating it for breakfast but a lot of the lettuce was old and brown and yellow. I don’t want any more. I see a tiny man about 6 inches high ride by on a tiny horse. He is at the foot of the hill. He goes so quickly then he disappears near some rocks. When I walk over to see where he has gone, at first it looks like he disappeared into some huge boulders that make a wall, but then I think he has climbed a small ravine that goes up the hillside. When I look up I see he has become huge, maybe 12 feet tall. He is a bulky guy, very thick in legs and arms. As I watch he leans over and becomes a huge boulder on the hillside. No one would ever know it’s a man. 

The man was so real in my dream. And I felt like I had seen a marvelous thing. Lately I have been having a lot of stress dreams, searching and not finding, worrying about things, so this felt like a real gift. The image is from my book "My dreams defy analysis."

Tuesday, April 16, 2024

Drab Reality

Drab Reality, an artist book made by Judith Hoffman with collage, drawing and gelli printing.
Drab Reality - artist book made by Judith Hoffman, 2022. Pages 1 and 2. Collage, drawing, gelli plate printing.
                                

Drab Reality, handmade one-of-a-kind artist book, 2022. 3.75 x 5.25 x 1 inch. Drumleaf binding. See still photos of all the pages on my website. I have been struggling to explain this book. Its version of reality is definitely not drab. But it's also not explainable. This book evolved from some experiments. I tried preparing the backgrounds with the gelli plate. I have also been experimenting with drawing on transparent papers for collage. There are more details on my website. 

Drab Reality will be in the Puget Sound Book Artists Member's exhibit at the Collins Memorial Library June 4 to August 1, 2024. And at the Evergreen State Collage, September 29 to December 20, 2024.

Yes, I made this book two years ago. I have been slow to get my photography set up back in place. I'm not good at photography, so it takes me hours and hours to set up, take some sample photos, make adjustments, re-learn the camera settings, etc. etc. I think I just wanted to go ahead and start another project when this book was finished. 


Friday, January 06, 2023

Is there one correct way to do blind contour drawing?

A piece of tracing paper with blind contour drawings. These sketches go into a box to possibly be used in collage later. None are considered finished at this point. They will be torn away from the main sheet and used individually. It's a low pressure way to work.

There are a number of ways that artists do blind contour drawings. In general the purpose is to strengthen observational and drawing skills. Most artists don't consider the final drawings to be a finished, presentable product. I find it a very useful way to generate sketches that are quirky. I consider some of them finished drawings that may end up in my collages. It's also a way for me to break away from my inclination to draw realistically, which drives me nuts.
Blind contour drawing on collaged background by Judith Hoffman
Blind contour drawing on collaged background, 5 x 7 inches.

 I think this is the method that most art teachers use: 
(This would likely be using a large sheet of paper.) 
  • Position yourself so you can see the subject, but not your paper. 
  • Fix your eye on an edge in the subject. 
  • Draw a continuous line on your paper, don't look at the drawing. Slowly follow the edge or contour with your eyes and the tool. 
  • Imagine that the drawing tool is touching the subject. 
  • Sometimes a timer is set. 

Blind contour drawing on collaged background by Judith Hoffman
Blind contour drawing on a collaged background. 5 x 7 inches

There is no reason why you have to follow these “rules.”

My favorite method is to draw fairly fast. My drawing are small, between 3 and 6 inches high. They usually take about two minutes for the blind contour drawing. I often draw an area - an eye and the nose for example - and then lift my pen and start the second eye somewhere else. This can create interesting disjunctions. If I have done five or six drawings without looking at the paper when I lift the pen, and I don’t like any of them, then I would probably look at the paper to move my pen. I don't try to get it in the perfect spot, just in the ballpark. If I’m not looking, eye glasses can be split into pieces that may not look good so I usually draw them all in one line. After I have five to ten quick drawings, I add hatching to my favorites while looking at the subject and the drawing. I always feel free to enhance areas I like - like the eyes. Hatching in general adds volume and character. It also sometimes adds to the oddness of the drawing.
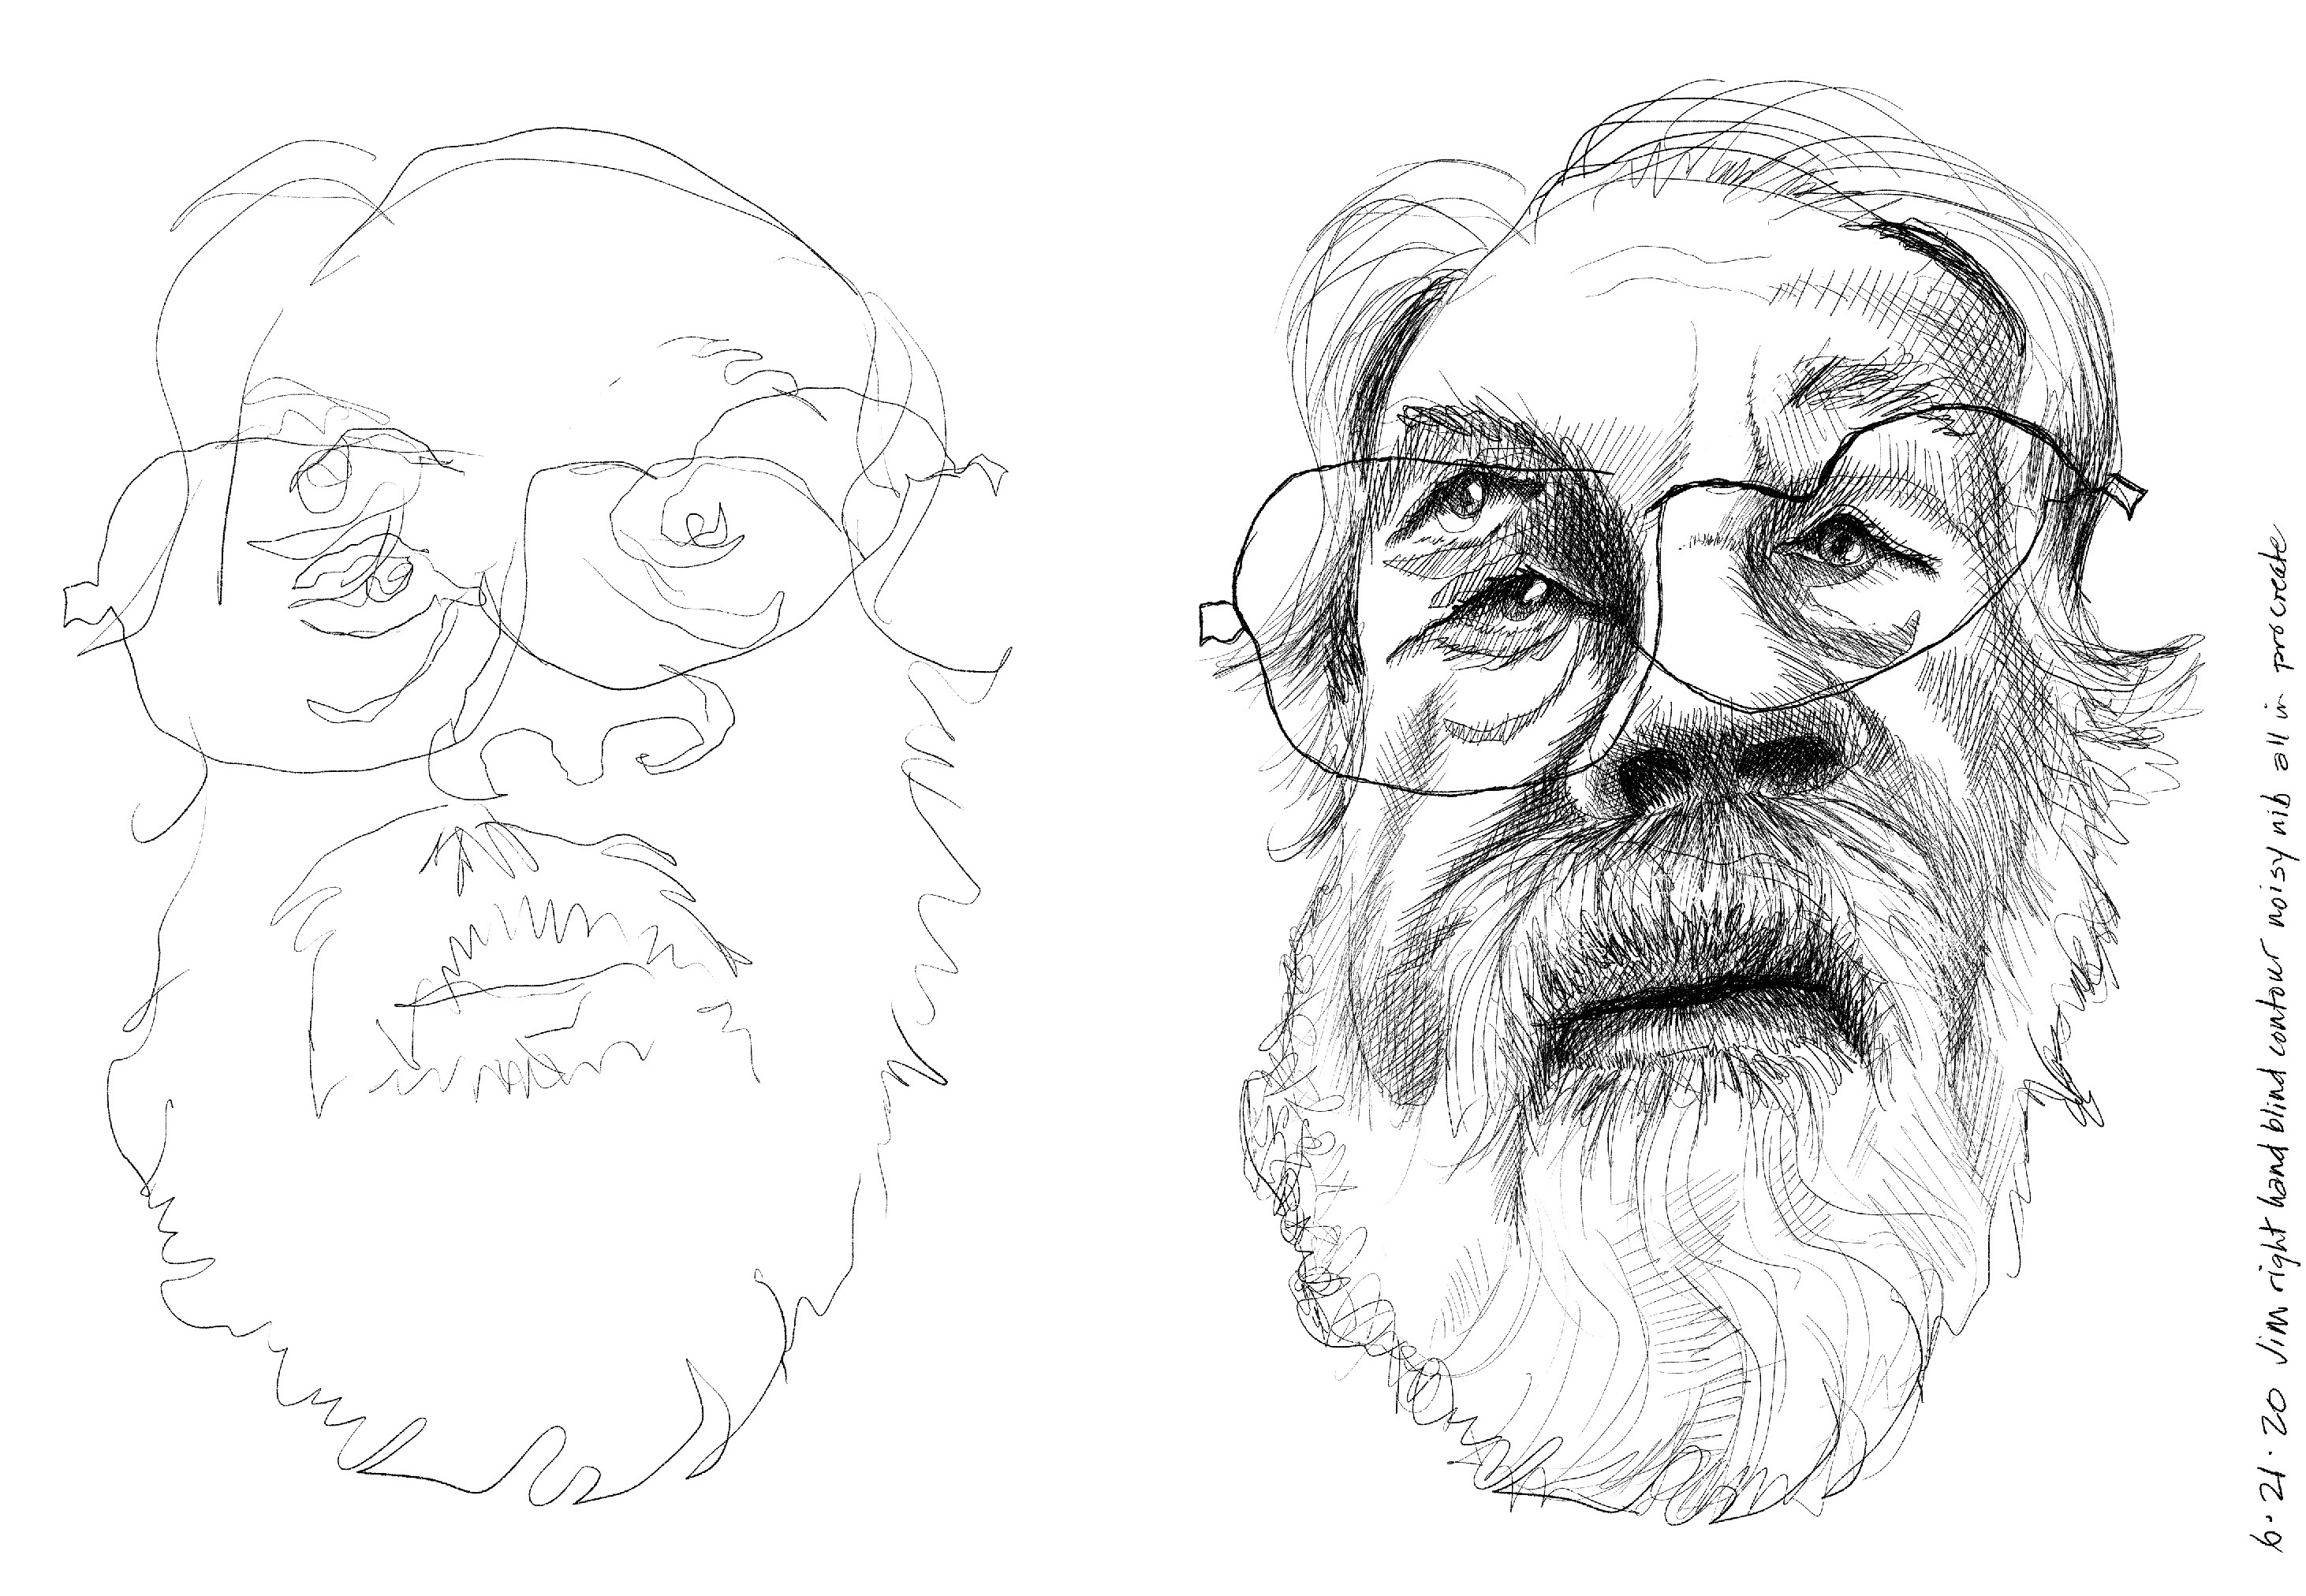
On left - blind contour drawing, on right the drawing has hatching added.
Blind contour drawing done on iPad with Procreate. I lost track of the eyes so there is an extra. Another layer was used to add hatching while looking at the photo.

A group of blind contour drawings by Judith Hoffman all from the same photo.
This is a two page spread from my sketchbook. The sketches were all done from the same photo. With eyes closed, I drew one face, opened my eyes and started the next one nearby. The hatching was added with my eyes open.

Possible variations: 
  • Use non-dominant hand. 
  • Or switch hands mid-drawing. 
  • Lift the drawing tool, don’t look at the paper to place it again. 
  • Or lift the tool, look at my paper to place it again but immediately look away. 
  • Draw fast. 
  • Draw very slow. 
  • Make hatching or scribbling marks as I do the blind part of the drawing. They have a different quality than the more deliberate ones I usually make while looking.
Feel-draw sketch, hatching added in ears, around nose and mouth while looking.

Another closely related drawing method is what I call the feel-draw. I saw this in a drawing technique book, but can't find it now. I feel my face and draw what I feel. Ups and downs, bumps, etc. It's another way to get an interesting drawing with distortions. The variations apply here too. I like the effect of doing some blind hatching or scribbling to mark the lower areas like ear holes. So far these haven't made it into collages, they seem too weird. But as I say that I realize I need to use them.

Hand drawing using blind contour method.
Hands can be very interesting using blind contour methods.


Working in Procreate on my iPad, I have a black layer behind the transparent layer I'm drawing on.

When drawing on an ipad, I put a layer under the layer I'm drawing on that is the same color as my drawing tool. When I am drawing with a black pen, I draw on the top transparent layer. There is a layer below that is also black. That black layer won't be turned off until the blind part of the drawing is complete. I sometimes use a third layer to add the hatching.


Blind contour drawings on tracing paper by Judith Hoffman
Another group of drawings on tracing paper. I probably won't use most of these. I only like one right now.


Sunday, August 07, 2022

A new kind of dip pen

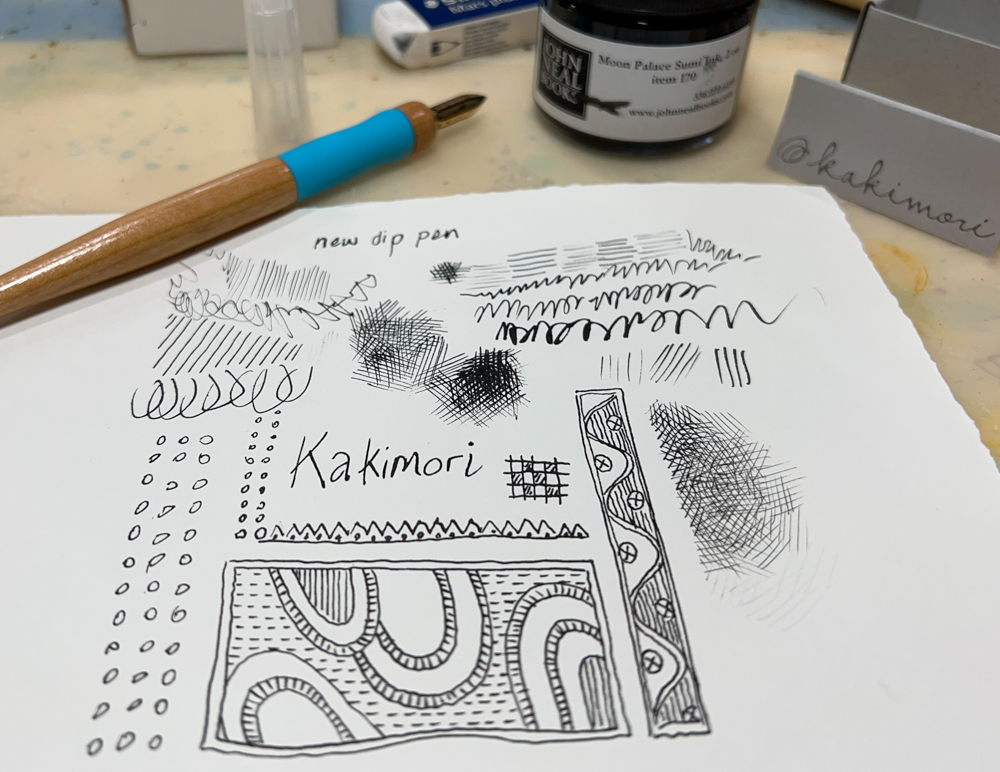
Kakimori dip pen test. I dipped the nib twice to get all these doodles. That's a lot of ink!

 Recently I saw a post on Jane Blundell's blog about a new dip pen. Of course I had to buy one. It came this week and I have played with it a bit. I do like it. I would say it's equivalent to a US medium. In the detail photo you can see the tip is not sharp. There is a stainless steel version that is supposed to be slightly finer. One of its strong points is the amount of ink it holds. I used sumi ink for my test. It seemed to cake up in the grooves after a few dips. Maybe my technique wasn't good. It was very easy to clean with a soft toothbrush. Later I tried Golden hi-flow acrylic. That worked well. Either could be diluted a bit with water. 

Isn't that interesting! A completely new design. There are parallel grooves all around the barrel to hold the ink. 

I paid around $35. at Wet Paint, but ordered some other stuff, so didn't pay shipping. Prices in the US are going up. The best price might be ordering from Japan with some friends, it seems the price is better from Kakimori. They also have nice nib holders, but to save a bit I think a good nib holder would be the Tachikawa. They are pretty easy to find. And they have a plastic cap that protects the nib. It's what I'm using.

Thursday, June 09, 2022

My Compendium of Medical Fears


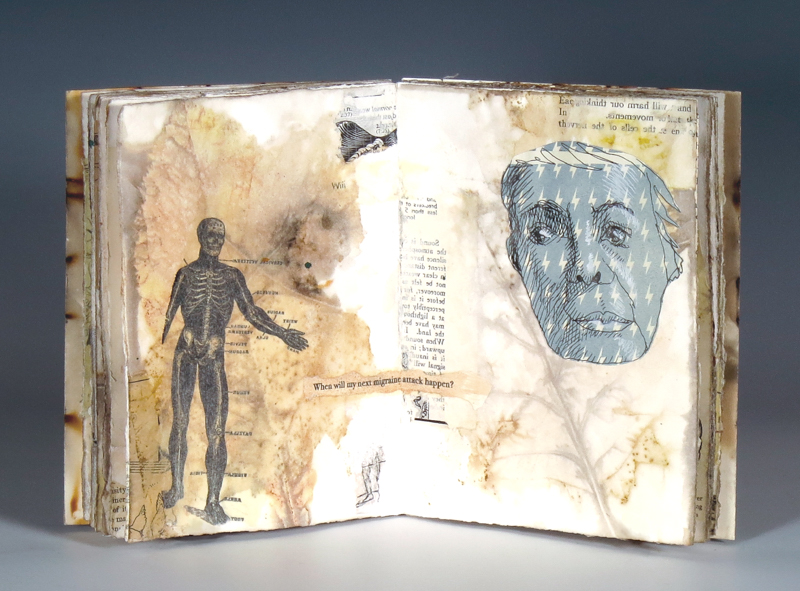
Artist book made by Judith Hoffman, made of eco-dyed paper, collage and drawing.
My Compendium of Medical Fears, eco-dyed paper, collage and drawing.

I finished this book at least a month ago, took the photos several weeks ago, and finally have processed them. So I have a web page for the book. All photos and information are on the web page. I have tons of medical fears at my age (77). It just now occurred to me, if 7 is a lucky number, 77 must either be double lucky or bad luck. I'll call it double lucky.

When will my next migraine attack happen?
When will my next migraine attack happen? A page from My Compendium of Medical Fears


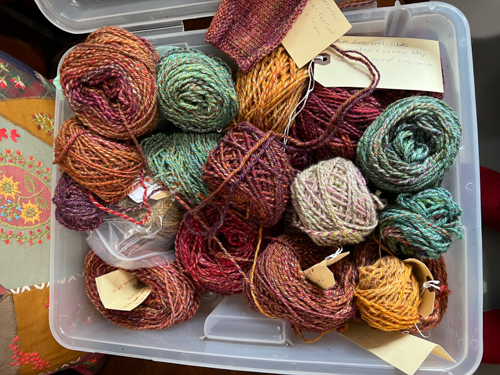
In non-book news, when I am stressed I have been spinning yarn. It's very repetitive and soothing. I am drafting two colors together to blend and mix up the colors. The result is almost a heathered effect. Mixing colors of fleece is different from paints. You can see most of the yarn is a medium tone. I need to make some lights and darks. It's a new challenge that keeps me interested.

Stay well, stay safe. Thanks for reading, I appreciate you all.


Friday, October 29, 2021

Pens, Inks and Drawing in Inktober 2021


Blind contour drawing - that's me, but it doesn't look like me, thanks to the blind contour.

Be sure to read the last paragraph about subscribing to this blog. Signing up for notifications is changing .

October is Inktober - a month when many people who are nuts about drawing with pen and ink, or brush, or markers, challenge themselves to do a drawing a day. This seems like a good time for a post on pen and ink drawing. I will intersperse a few of my drawings from this month.


Blind contour and hatching. 

The main time I draw is in the evening, sitting with a cat on my lap and a cup of tea. I don't want ink that can spill, so fountain pens are ideal. I need ink that is water proof so I can use my drawings for collage. I prefer to refill a fountain pen instead of buying a new one, or buying plastic cartridges. And you can mix inks in the same brand to get a wide variety of colors. I often use black or brown, so I'm not sure this is a big deal to me. But I want options.

Judith Hoffman blind contour with added hatching

I have finally settled on De Atramentis Document Inks. Jane Blundell's posts about fountain pen inks are very helpful, this is where I first learned about the De Atramentis inks. This seems to be her most recent post, it includes links to previous posts. Note the Document inks are the ones that dry waterproof. They are changing their bottles and name, the newer Artist Inks are the same formula.

Couldn't find my pen, I really like the weird bottle shapes.

Many fountain pen inks will bleed when wet media is applied over them. The De Atramentis Document inks have been waterproof for me with a few exceptions. My usual method is to draw directly on the substrate - which is usually collage held down with Golden Matte Medium, or to draw on architect's tracing paper, and then use that as collage material. Either way the drawing ink needs to be waterproof.  The De Atramentis Inks work great. The one exception is their white, which seems to be made in a different way. It will settle in the pen. You need to shake the pen a bit and scribble on scrap paper to get it going. The white sometimes smears a bit when I am collaging, especially when I have drawn on a layer of acrylic paint. When applied to the architect's tracing, it smears a tiny bit where it is very thick but works well all in all. I try to just paint over the collaged paper with the matte medium, then squeegee off excess with a rib squeegee. I don't work over the same area multiple times.

Blind contour with hatching, Inktober 2021

In the last 5 years I have tried a number of inexpensive fountain pens. Now I am using what pen nerds might call an affordable fountain pen, but to me it is fairly expensive. It's the Twisbi Eco, $35.50 at JetPens. I switched to the Eco because the ink in the nib doesn't dry out. I can lose a pen for weeks, find it under my chair, and start drawing right away. There is a piston filler that works well, but you have to be careful not to twist the knob at the end of the pen when there is ink in it. If you do, ink will leak out. 

Insomnia. Inktober 2021.

I get most of my pens and inks from JetPens. They have a number of short videos explaining and demonstrating paper, pens and inks. Here is an article about fountain pen nibs. Another place that has been a good source is the Goulet Pen Company. They have the De Atramentis Document White. I haven't used them as much as JetPens, but have been happy with both places. Please Note: I am not affiliated with JetPens or Goulet Pens in anyway, I just want to suggest places I have found to be reliable. Both are in the US.

Strange rabbit from Svankmeyer's Alice. I like to experiment with hatching styles.

Some business: Blogger says they are no longer going to use the feed burner subscription widget thing. I do still see the sign up to get on my mailing list on my blog. I have been resisting signing up with another company because I am so tired of privacy issues. I feel if you give them your email address you are in for something unseen. And companies end up getting hacked and information is stolen. So I am making my own subscriber list, and sending out reminders when I post a new blog post. For now feed burner seems to still be working, or at least I get notifications when I post. It was supposed to have stopped in August. I have no idea what will happen, but if you want to be sure to be notified of new blog posts, email me at judithDOTzDOThoffmanATgmailDOTcom. You can unsubscribe at anytime, just send me an email. I don't want to send spam to your inbox.


Friday, June 25, 2021

Another day, another workshop

Intaglio test print judith hoffman
Test print, Tetra Pak plate

 I resolved weeks ago to not take anymore workshops. It takes time to experiment with new techniques and for things to sink in. Then I saw a post about a pasta machine printing workshop at the Jaffe  Center for the Book Arts.  I signed up, of course. It's something I had been curious about. Right now we seem to have a bounty of online workshops. I hope they never end, but they might, when the virus is under control. The first class was instructions and demos. We have a week to practice, then we meet again next Tuesday. The instructions were clear and the examples Bettina showed us were inspiring. 

Above is my third or fourth print, the plate is a piece of Tetra Pak. I traced a recent drawing and transferred it to the plate. I need to go over some lines, they should be deeper. Or maybe I didn't ink the plate correctly? The beauty of Tetra Pak plates is that they are free. I can sit and draw blind contours on them without tracing or planning and then work more on the ones I like.

Intaglio test print judith hoffman
Milk carton and Tetra Pak plates, first print and ghost.

Above are my first prints - they came out amazingly well. The ink seemed almost too wet and my ghost prints are very faint. But I am pleased with the first prints. That was yesterday. I thought this would be easy. Today the Tetra Pak plate didn't print so well, and the same ink was thick on the plate. When I tried to wipe it off it didn't want to move. I ended up taking a slightly damp piece of tissue paper and wiping most of the ink away. Then I had to use the ball of my thumb to smooth out the streaky marks. This will take some practice.

And of course there is another workshop on the horizon. It's Seeded Notebook with Henrik Drescher. I have admired his drawing style for years and years. A chance to watch him work in a sketchbook is very alluring. Check out the short video, it's a simple idea. But the second half of the class is watching Henrik work. And it will be a way to use all the cast-off prints I am making right now.

I'm looking for suggestions for a thin paper that would be good for printmaking, but also would be good for collage. Any ideas?

Sunday, June 13, 2021

Artist Book: Seeing and Seen


Seeing and Seen Artist Book by Judith Hoffman
Seeing and Seen, front and back cover. 2.5 x 3 inches, artist book by Judith Hoffman

Seeing and Seen Artist Book by Judith Hoffman
Seeing and Seen, pp 1 and 2

Before the book I want to tell you Feedburner is going away. If you are getting email notification when I post a new blog entry, that will end in July. I have downloaded the email addresses from Blogger and will send you an email when a new blog post is out. If you want me to email you directly, you can let me know at judithDOTzDOThoffmanATgmailDOTcom. Of course change the capital letters to the appropriate symbol. That is a "z" as in zebra. I will also announce new blog posts on my Facebook pages and my Instagram. I have two Facebook pages - I prefer to use the personal one but I will keep posting notifications on my "business" page also. Please note - you can't count on Facebook showing you my posts. It may help if you add my feed to your favorites. My Instagram gets more love than my Facebook page, but not many reposts. 

I made this book in 2020 and apparently never took photos or posted about it. Images should enlarge.

I am happy spending most of my time alone, but during the pandemic I realized how important it is for me to spend some time with my friends. I want to see them, to understand them in their complexity (or at least try) and to be seen by them.

Seeing and Seen, Artist book by Judith Hoffman
Seeing and Seen artist book pp 5 and 6

My art energy was on pause last year, but one thing I did was look through old, unfinished projects.

2.5 x 3 inch painting/collage tests Judith Hoffman
2.5 x 3 inch old painting/collage tests, sanded to be glued back to back

Among many other things, I found a stack of small mixed media collage experiments on 300 pound watercolor paper. I love small! And because the paper was already used, I didn't feel bad making some experimental collages on the back sides. Above you see the old painting experiments, sanded before gluing them back to back with PVA. They did get interesting didn't they? Sanding turns out to be an awesome technique.

Seen and Seen artist book by Judith Hoffman
Seeing and Seen artist book by Judith Hoffman pp 7 and 8

I started the experiments by collaging found images that reflected my scattered mind. Then I added drawings of faces to the results. The drawings are on architect's tracing paper, which is fairly transparent.

Seeing and Seen artist book by Judith Hoffman
Seeing and Seen artist book by Judith Hoffman pp 9 and 10

As some of the collages came together I spread them on my work table and made pairs of pages. I realized some of the people in the images were trying to connect with each other.

Seeing and Seen artist book by Judith Hoffman
Seeing and Seen artist book by Judith Hoffman pp 3 and 4

Some looked away, connections were not made. But a few were able to see each other and make contact. 

Seeing and Seen artist book by Judith Hoffman
Seeing and Seen artist book by Judith Hoffman pp 11 and 12

To assemble the pages I glued the collages back to back. I drilled small holes in each page and bound them with Keith Smith's singe sheet binding method. The original paintings are not seen, except for a small bit around the edges which you can see that most clearly in the first photo of the front and back cover.


Tuesday, October 27, 2020

 I have been drawing most days for Inktober. I am also taking the Preservation Enclosures class I mentioned in my last post. Next week I will start a Clamshell box class, also with Andrew Huot. Below is a little photo essay of some of my Inktober drawings. They are all on the architect's tracing paper that I use in collage. You can see I don't keep a perfect, beautiful sketchbook. I try out ideas and experiment with things that pop into my head. I decided I needed a hard cover, that's the first photo. Because I am going to take the sketchbook apart when it's full (and use the drawings for collage)  I quickly made a temporary cover that holds the sheaf of tracing paper in place with a piece of elastic. Then I can slip another sheaf of papers in there.

sketchbook with architect's tracing paper. Judith Hoffman
Hard cover for tracing paper sketchbook made with binder's board and book tape. Judith Hoffman


sketchbook with architect's tracing paper. Judith Hoffman
Sketchbook, tests, textures. Judith Hoffman

sketchbook with architect's tracing paper. Judith Hoffman
Inktober sketchbook, patterns and doodles. Judith Hoffman

Inktober sketchbook Judith Hoffman
Inktober sketchbook, doodles, tests, patterns. Judith Hoffman

Inktober sketchbook. Judith Hoffman
Inktober sketchbook, various faces and patterns. Judith Hoffman

Inktober sketchbook, center spread showing how it was assembled. Judith Hoffman
Center spread - testing various transparent acrylics. 

Inktober sketchbook. Judith Hoffman
Inktober sketchbook, faces and patterns.

Inktober sketchbook. Judith Hoffman
Inktober sketchbook. I like the layered shadows.


Inktober sketchbook and cat. Judith Hoffman
Inktober sketchbook and cat. Everyone's a critic. 

Monday, September 28, 2020

A New Plan for Inktober


Two Inktober sketchbooks made with 7 pound canary tracing paper.

In early August I planned to do my Inktober drawings in a sketchbook I made with old envelopes. (That post is here) Recently I have been drawing on a pamphlet stitched pad of yellow 7 pound tracing paper so I could use the drawings in collages. Tonight I made a sketchbook with the tracing paper to use instead of the envelope sketch books. The new one is about 7 x 9 inches, a size I usually prefer for sketching. It's also just a stack of papers pamphlet stitched together. When I am done I will cut the thread and coat all the drawings I like with matte medium.

Interesting layers of images may lead to a new idea.

There is an additional benefit to this paper. There are times when I get composition ideas from the layers of sketches. I am using d'Atramentis document inks in grey, dark red and a mixture of turquoise and brown that is very close to black. They are a little slow to dry but these colors are waterproof once they are dry.

Thursday, September 03, 2020

Coating collage papers with matte medium


Drawings on architect's tracing paper, coated with matte medium

I have been not very energetic lately, but a good way to keep busy is to clean the studio - that hasn't happened yet - or to draw on architect's tracing paper for future use in collage. I like to draw faces or patterns. This is a low- risk activity. If I don't like a face it can be tossed, or maybe cut into pieces. Drawing patterns is very meditative. I coat the tracing paper with matte medium to pre-size it and make it more translucent. 

Drawings on architect's tracing paper, coated with matte medium

It seems to work best if I coat both sides at the same time, so I have been using old seed catalogs, painting one side of the tracing paper, flipping it over immediately and painting the other side. The seed catalog page gets pretty wet with matte medium, but I just keep going. I also use this method to coat my collage papers with a mixture of PVA and water before using so they don't curl quite as much. The inks are all d'Atramentis document inks. They are pretty waterproof and permanent. I do find the red ink smears a bit if I brush over it several times. The tracing paper is not as absorbent as drawing paper, some other inks also smear. Pitt brush pens will completely dissolve the d'Atramentis inks on this tracing paper.

Sunday, August 30, 2020

Preparing for Inktober I made two small sketchbooks from envelopes


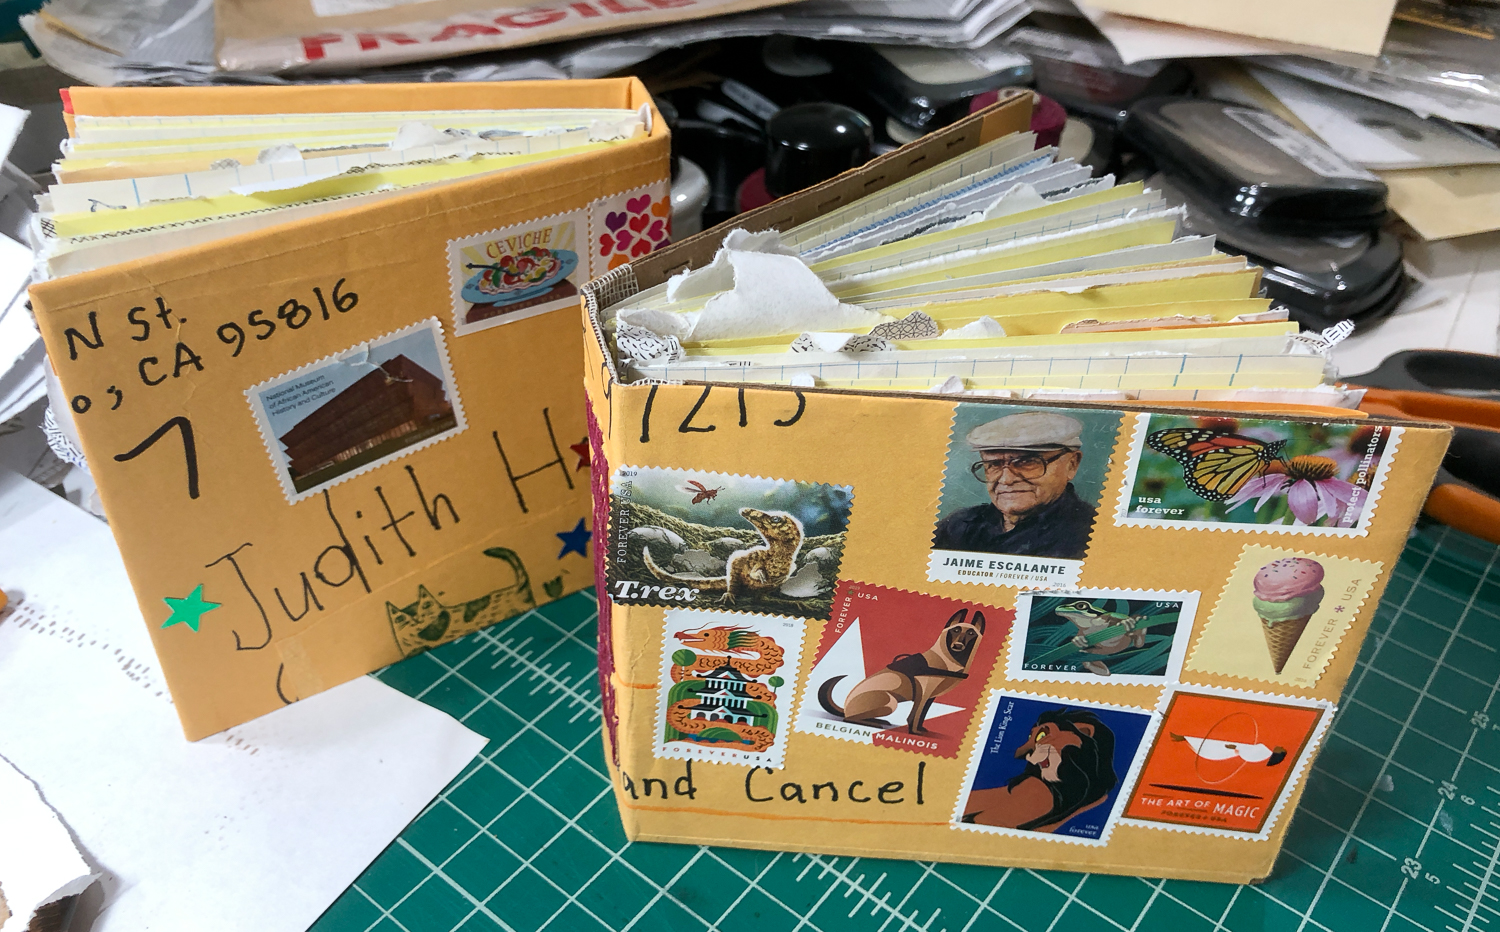
I have been saving envelopes for a couple of years, ever since I bought a few sketchbooks made with mail from Helen Coldwell at badbooks on etsy. I used one of Helen's books for Inktober in 2018 and enjoyed it very much. She isn't making the mailed format any more, but does have mixed paper books in several sizes. I just recently bought a couple of those, they are equally fun, and I didn't have to make them.


This year I thought I should take out the big pile of envelopes and make them into something. I did add in some graph paper, some gridded paper, a few other things. But it's 90% envelopes. The cover is an old cardboard box, covered with an envelope a dear friend sent me stuff in. (Thank you Wendy!) I lined the spine with some super to make it stronger. 

This year I plan to do a very low pressure Inktober. No pressure at all actually. I will draw with ink every day, but it may just be a 5 minute doodle and I won't feel bad about that.

Saturday, August 08, 2020

What to do - I love glue

5 x 7 postcard. Blind contour, drawing, collage. Judith Hoffman

Well, it's more like "I love PVA." I have been trying to make collages on postcard size pieces of paper. The paper tends to curl. I'm using both 90 pound papers and 300 pound papers as substrates, both coated on two sides with Matte medium. Next I collage on some background papers for texture and interest, using PVA. These are not coated before collaging. My blind contour drawings go on top of the "texture" papers. They are on tracing paper because it's pretty transparent. The tracing paper shrinks a lot when glued down, so I coat it with matte medium on both sides, allow to dry, then glue it down with more matte medium. Neither substrate stays flat. Although I think things are improved by coating both sides of the papers. My process is intuitive, and I try to be fairly fast. I don't really want to plan every step, coat all the papers and then wait for them to dry before doing the collage.

5 x 7 postcard. Blind Contour drawing, collage. Judith Hoffman

There is a method, invented by Jonathan Talbot, where you coat all your papers with gloss medium and them iron them together. I have tried it, and it works perfectly. It even works with matte medium. It's almost too perfect. You have to have a plan, coat all papers, then iron everything in place. I am resisting that at the moment. I hate ironing and planning and really like the glue process. 

Transfer test, using Talbot transfer paper

I am also experimenting with transfers, thinking I could use that method instead of the drawings on tracing papers. Above is the first test - I drew on the Talbot transfer paper, ironed it to an old book page and after wetting the page, I rubbed off the transfer paper. I think this would work okay with a stronger substrate. But again it's not a fun process. If the whole collage was sealed with matte medium, I think this would work okay. The rubbing is tedious, although the Talbot paper comes off pretty easily. I wonder why I think this is supposed to be fun? I do also like the warm yellowish tones of the tracing paper. They show a little in both the postcards above.

Work table testing zone
And finally a shot of my work table. It's just a big sheet of 4 by 8 plywood on shelves so I cover it with this old yellow paper I got very cheap years ago. It's the perfect surface to test whatever I am about to draw with.