Showing posts with label Collage. Show all posts

Tuesday, June 17, 2025

I eat lettuce and milk for breakfast

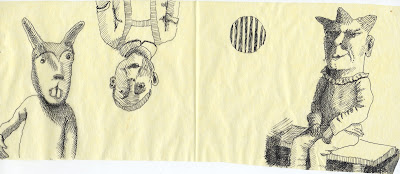
A man on the left looks amazed at a cat on the right. A person with a cat head runs behind them.
A page from my handmade book My dreams defy analysis. ©2024 7.75 x 5.75 x 1 inch (closed).

I am emptying a big bowl of lettuce and milk onto the ground behind our house. I was eating it for breakfast but a lot of the lettuce was old and brown and yellow. I don’t want any more. I see a tiny man about 6 inches high ride by on a tiny horse. He is at the foot of the hill. He goes so quickly then he disappears near some rocks. When I walk over to see where he has gone, at first it looks like he disappeared into some huge boulders that make a wall, but then I think he has climbed a small ravine that goes up the hillside. When I look up I see he has become huge, maybe 12 feet tall. He is a bulky guy, very thick in legs and arms. As I watch he leans over and becomes a huge boulder on the hillside. No one would ever know it’s a man. 

The man was so real in my dream. And I felt like I had seen a marvelous thing. Lately I have been having a lot of stress dreams, searching and not finding, worrying about things, so this felt like a real gift. The image is from my book "My dreams defy analysis."

Wednesday, April 17, 2024

Momigami experiments with hand cream


momigami experiment by Judith Hoffman using hand cream
Momigami experiment - left is the momigami, right is the original inkjet print on architect's tracing paper. I was surprised the momigami got much lighter than the original.

Momigami paper on left after rubbing on some acrylic paint or hi-flow inks.

(All images will enlarge - just click on them.) My friend Eileen of the Good Junk Sanctuary came over and showed me how to make momigami. It's something I have been curious about for years. We made a couple of pages while we talked about art and life. She mentioned that you could use hand cream, cooking oil or a gel made from konnyaku powder that is intended for momigami. After Eileen left I experimented with hand cream. (There are lots of videos online for making momigami.) I'm using Vaseline Intensive Care but I think hand creams are pretty much all the same. I first made a number of pieces of momigami from different papers. I let them dry overnight, the hand cream seems to go away. Maybe it's absorbed? The next day I rubbed acrylic paint diluted with glazing medium or hi-flow paint on them. All the paints were very thin, I wanted a transparent layer that wouldn't obscure the original patterns. My goal is to have interesting collage papers. All the papers became softer, and heavily wrinkled of course. The more fragile papers developed little holes and tears along the edges which I love. Rubbing the papers with paint did smooth out most of the physical wrinkles but emphasized the visual texture. At times the backs are almost more beautiful than the fronts.

Momigami experiment by Judith Hoffman on Amazon brown envelope.
The section of a brown envelope on the right with the arrow head is the momigami. The paper had already been printed with some acrylic paints on a gelli plate. The light spots are titan buff, a fairly opaque paint.
Momigami experiment by Judith Hoffman on Amazon brown envelope.
The next day the momigami paper was rubbed with acrylic paint. Not much change, but the more opaque titan buff spots stand out beautifully from the ground. Hard to see the effect in the photo. 
Momigami experiment by Judith Hoffman on architect's tracing paper printed with acrylic paints on a gelli plate
The momigami piece is on the right, the original paper was printed on the gelli plate. I was surprised at how much lighter it became. This is also architect's tracing paper. It's very tough. 

Momigami paper painted with acrylic paints to bring out texture.
I painted some thin blues and sepia toned paints over the momigami sample. 
Momigami on found poetry magazine pages by Judith Hoffman
These two pages came from a magazine. The small figure on the right looks particularly good for collage. 

momigami on magazine pages then painted with various acrylic paints by Judith Hoffman
The pages were then painted with blue and golden brown acrylic paints.

Momigami on found magazine pages by Judith Hoffman
I like the network of lines caused by paint sinking into the wrinkles. These will make inspiring collage materials.

Momigami on gardening magazine page by Judith Hoffman
On the left - momigami on a gardening magazine pages. The ink came off the page and smeared  around some, making my hands inky and the page look dirty. 

Momigami page that was so fragile I tried to adhere it to a piece of light tracing paper.
This was another gardening magazine page that was fragile. To strengthen it I tried to coat it with mat medium on a gelli plate. The paper stuck to the plate so I let it dry then coated it with more mat medium and laid a piece of architect's tracing paper on top. When that was dry I was able to peel the whole sheet off. What I have is some beautifully grungy text and plants. 

Bits of momigamied paper, coated with various acrylic paints to add some color in the cracks by Judith Hoffman
Bits of a page that fell apart. I love the cracks and the subtle colors. 

The back of previous bits of collage papers, the backs are often as nice as the fronts, by Judith Hoffman
The backs of the previous bits of paper. The visual textures and colors are lovely. 

Tuesday, April 16, 2024

Drab Reality

Drab Reality, an artist book made by Judith Hoffman with collage, drawing and gelli printing.
Drab Reality - artist book made by Judith Hoffman, 2022. Pages 1 and 2. Collage, drawing, gelli plate printing.
                                

Drab Reality, handmade one-of-a-kind artist book, 2022. 3.75 x 5.25 x 1 inch. Drumleaf binding. See still photos of all the pages on my website. I have been struggling to explain this book. Its version of reality is definitely not drab. But it's also not explainable. This book evolved from some experiments. I tried preparing the backgrounds with the gelli plate. I have also been experimenting with drawing on transparent papers for collage. There are more details on my website. 

Drab Reality will be in the Puget Sound Book Artists Member's exhibit at the Collins Memorial Library June 4 to August 1, 2024. And at the Evergreen State Collage, September 29 to December 20, 2024.

Yes, I made this book two years ago. I have been slow to get my photography set up back in place. I'm not good at photography, so it takes me hours and hours to set up, take some sample photos, make adjustments, re-learn the camera settings, etc. etc. I think I just wanted to go ahead and start another project when this book was finished. 


Friday, January 06, 2023

Is there one correct way to do blind contour drawing?

A piece of tracing paper with blind contour drawings. These sketches go into a box to possibly be used in collage later. None are considered finished at this point. They will be torn away from the main sheet and used individually. It's a low pressure way to work.

There are a number of ways that artists do blind contour drawings. In general the purpose is to strengthen observational and drawing skills. Most artists don't consider the final drawings to be a finished, presentable product. I find it a very useful way to generate sketches that are quirky. I consider some of them finished drawings that may end up in my collages. It's also a way for me to break away from my inclination to draw realistically, which drives me nuts.
Blind contour drawing on collaged background by Judith Hoffman
Blind contour drawing on collaged background, 5 x 7 inches.

 I think this is the method that most art teachers use: 
(This would likely be using a large sheet of paper.) 
  • Position yourself so you can see the subject, but not your paper. 
  • Fix your eye on an edge in the subject. 
  • Draw a continuous line on your paper, don't look at the drawing. Slowly follow the edge or contour with your eyes and the tool. 
  • Imagine that the drawing tool is touching the subject. 
  • Sometimes a timer is set. 

Blind contour drawing on collaged background by Judith Hoffman
Blind contour drawing on a collaged background. 5 x 7 inches

There is no reason why you have to follow these “rules.”

My favorite method is to draw fairly fast. My drawing are small, between 3 and 6 inches high. They usually take about two minutes for the blind contour drawing. I often draw an area - an eye and the nose for example - and then lift my pen and start the second eye somewhere else. This can create interesting disjunctions. If I have done five or six drawings without looking at the paper when I lift the pen, and I don’t like any of them, then I would probably look at the paper to move my pen. I don't try to get it in the perfect spot, just in the ballpark. If I’m not looking, eye glasses can be split into pieces that may not look good so I usually draw them all in one line. After I have five to ten quick drawings, I add hatching to my favorites while looking at the subject and the drawing. I always feel free to enhance areas I like - like the eyes. Hatching in general adds volume and character. It also sometimes adds to the oddness of the drawing.
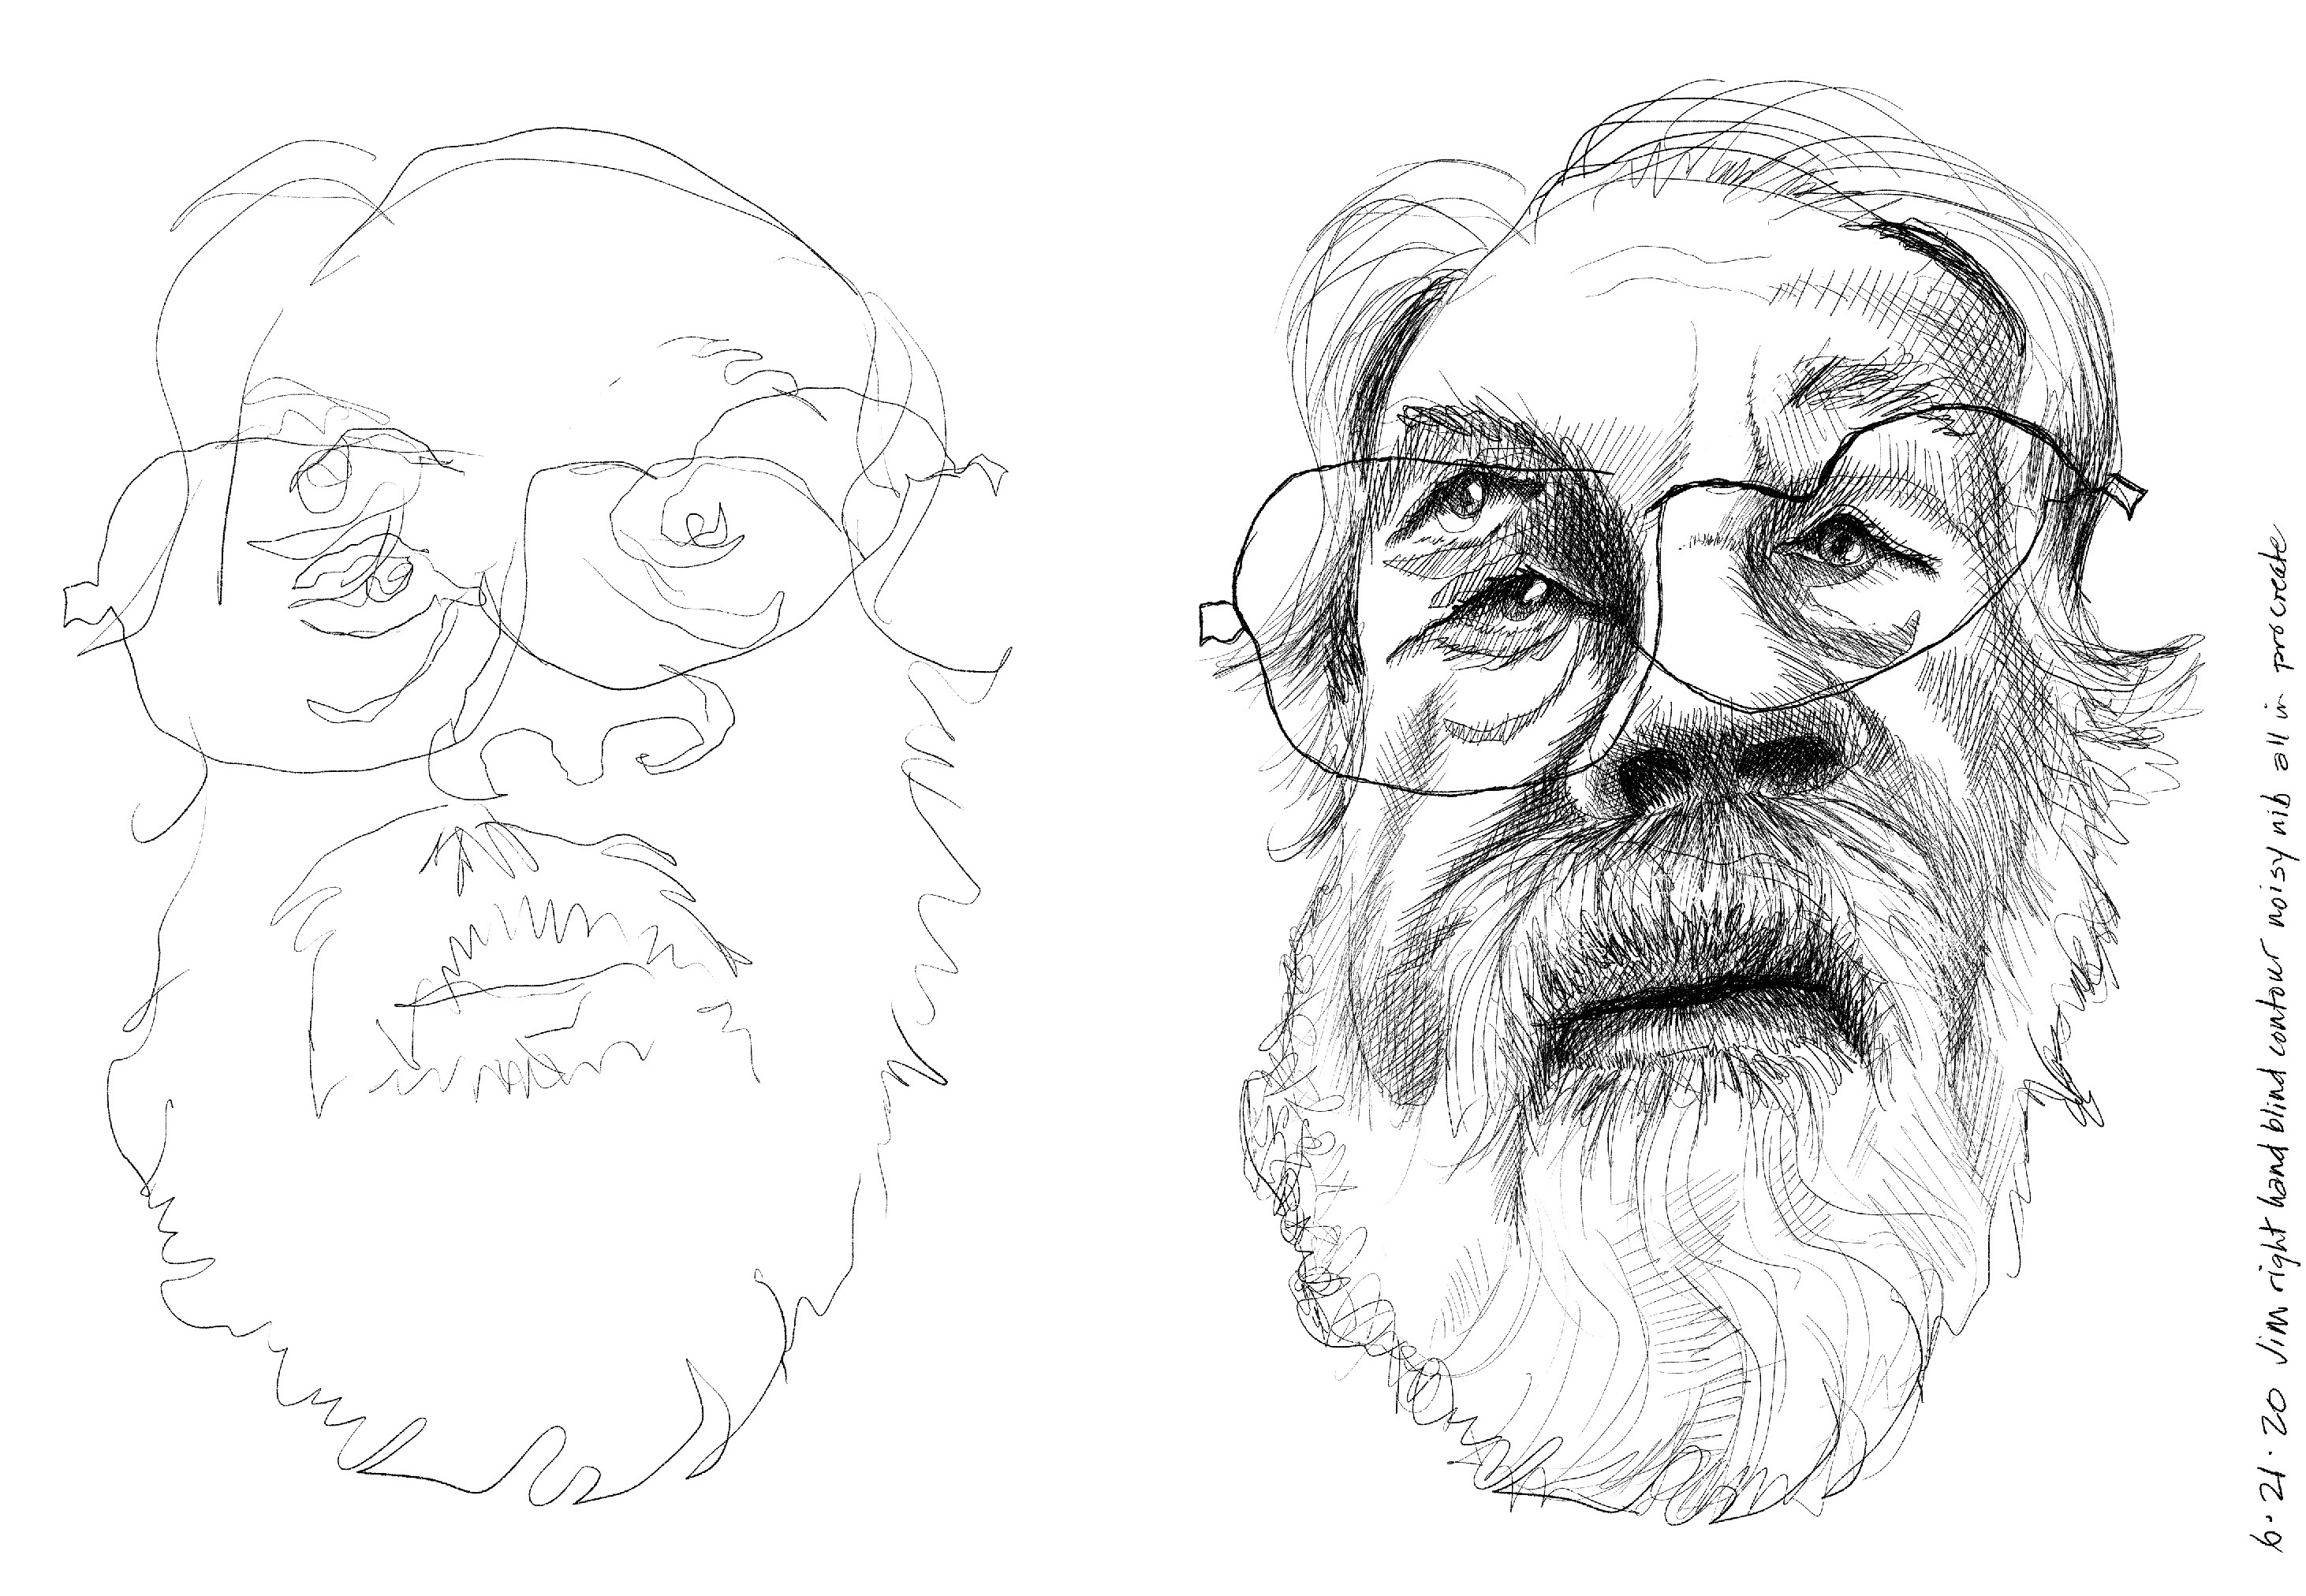
On left - blind contour drawing, on right the drawing has hatching added.
Blind contour drawing done on iPad with Procreate. I lost track of the eyes so there is an extra. Another layer was used to add hatching while looking at the photo.

A group of blind contour drawings by Judith Hoffman all from the same photo.
This is a two page spread from my sketchbook. The sketches were all done from the same photo. With eyes closed, I drew one face, opened my eyes and started the next one nearby. The hatching was added with my eyes open.

Possible variations: 
  • Use non-dominant hand. 
  • Or switch hands mid-drawing. 
  • Lift the drawing tool, don’t look at the paper to place it again. 
  • Or lift the tool, look at my paper to place it again but immediately look away. 
  • Draw fast. 
  • Draw very slow. 
  • Make hatching or scribbling marks as I do the blind part of the drawing. They have a different quality than the more deliberate ones I usually make while looking.
Feel-draw sketch, hatching added in ears, around nose and mouth while looking.

Another closely related drawing method is what I call the feel-draw. I saw this in a drawing technique book, but can't find it now. I feel my face and draw what I feel. Ups and downs, bumps, etc. It's another way to get an interesting drawing with distortions. The variations apply here too. I like the effect of doing some blind hatching or scribbling to mark the lower areas like ear holes. So far these haven't made it into collages, they seem too weird. But as I say that I realize I need to use them.

Hand drawing using blind contour method.
Hands can be very interesting using blind contour methods.


Working in Procreate on my iPad, I have a black layer behind the transparent layer I'm drawing on.

When drawing on an ipad, I put a layer under the layer I'm drawing on that is the same color as my drawing tool. When I am drawing with a black pen, I draw on the top transparent layer. There is a layer below that is also black. That black layer won't be turned off until the blind part of the drawing is complete. I sometimes use a third layer to add the hatching.


Blind contour drawings on tracing paper by Judith Hoffman
Another group of drawings on tracing paper. I probably won't use most of these. I only like one right now.


Wednesday, June 15, 2022

Effie Wood Goes on Holiday


Effie Wood Goes on Holiday, an accordion fold artist book by Judith Hoffman made of paper, collage and drawing.
Effie Goes on Holiday, accordion fold book by Judith Hoffman

Effie Goes on Holiday, ©2021. 3.5 x 4 x .75 Collage on watercolor paper, drawing, family photos scanned and printed on Epson SC P-700 printer. See the whole book on my web site. When I was a kid we had many family holidays at my grandparents house in Cincinnati. There was an assortment of ladies that seemed very old to me. I had two living great-grandmothers on my mom's side. There was also my Great Aunt Anna and her roommate, Effie Wood. When I was a kid I was told Aunt Anna was an old maid, Effie lived with her and they were close friends.

Effie Wood, possibly on holiday

It wasn't until several years ago, talking to my cousin, that I found out they might have been a couple. It was a moment for me, I never questioned the story. It must have been hard to be a lesbian couple in those days. It seems the women in our family didn't know they were a couple but the men did. Would they have been shocked? What a sad situation. Effie was a family member but she was always considered as somewhat outside the family. There are very few photos of her, she isn't in the genealogy records. She does appear in some short videos my granddad took. Luckily my uncle put them on a cd. You can see more views of the book on this web page.

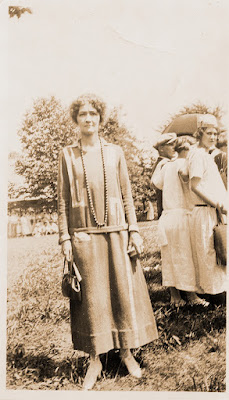
Effie Wood on holiday. 

This is the photo that inspired the book. It looks like a seaside resort to me. The story in the book is  conjecture.

Thursday, June 09, 2022

My Compendium of Medical Fears


Artist book made by Judith Hoffman, made of eco-dyed paper, collage and drawing.
My Compendium of Medical Fears, eco-dyed paper, collage and drawing.

I finished this book at least a month ago, took the photos several weeks ago, and finally have processed them. So I have a web page for the book. All photos and information are on the web page. I have tons of medical fears at my age (77). It just now occurred to me, if 7 is a lucky number, 77 must either be double lucky or bad luck. I'll call it double lucky.

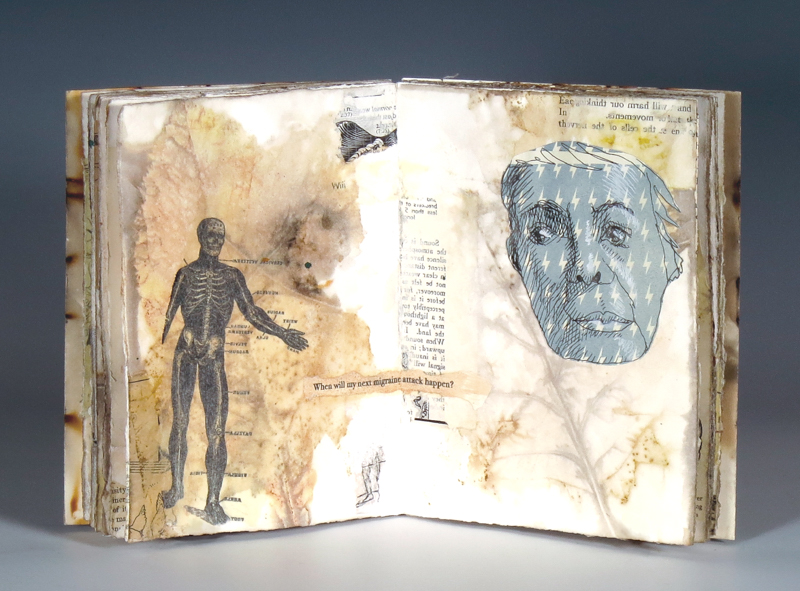
When will my next migraine attack happen?
When will my next migraine attack happen? A page from My Compendium of Medical Fears


In non-book news, when I am stressed I have been spinning yarn. It's very repetitive and soothing. I am drafting two colors together to blend and mix up the colors. The result is almost a heathered effect. Mixing colors of fleece is different from paints. You can see most of the yarn is a medium tone. I need to make some lights and darks. It's a new challenge that keeps me interested.

Stay well, stay safe. Thanks for reading, I appreciate you all.


Sunday, May 15, 2022

More tests with pen, ink and matte medium

I worry about the unknowable future. A scan from a book that's almost finished. Collage on eco-dyed paper

Last year I suggested d'Atramentis inks for drawing because I was finding them to be waterproof. Recently I have been having more bleeding when I collage drawings down with matte medium. I am not sure what's going on, it may be that I'm using a different architect's tracing paper. I did use up a roll recently. Unfortunately I don't know what the brand was. 

So now I'm trying to find new ways to seal the drawings before collaging them down. I apply matte medium to the back of the image and the substrate, then lay on the drawing. I coat the top of the collage with matte medium, pressing the collage down with the brush. I smooth it out with my finger and wipe away excess matte medium.

Of course I don't want the image to smear as I brush on matte medium or wipe away excess. Talking to my critique group recently about this, they suggested I try varnish or shellac. And then I saw a mention online of applying matte medium to a gelli plate and pressing the collage material on to that. Varnish is thinned with mineral spirits, very bad for lungs, so that's my last resort. Shellac is thinned with alcohol. I don't know if a small amount would be bad, but I do keep the windows open. If I'm using it a lot I set up a fan to pull out air. Matte medium is acrylic, and so for most people maybe not bad to breathe. 

Testing shellac to seal a drawing before collaging.

Above is the shellac test - It's a brown d'Atramentis ink sketch on architect's tracing paper. I sealed it with a thin coat of Zinsser shellac, thinned with 91% alcohol about 3 to 1, alcohol to shellac. 91% alcohol is  apparently flammable. People online say you shouldn't thin shellac with 70% alcohol, there is too much water. I haven't tested that. At this dilution the shellac doesn't change the color of the tracing paper. Undiluted it has a warm yellow color which is very nice when brushed onto paper to make it look old. I let it dry for 3 or 4 days. Then I collaged the sketch in my usual way. The ink does not bleed at all while brushing on shellac or while collaging it. I like the smell of the shellac, but don't know if it's bad to breathe. 


Above is a test with black d'Atramentis ink and a color print from my Epson printer, which uses the Ultrachrome K3 inks. A thin coat of Golden matte medium was applied to both images using the gelli plate. I rolled the matte medium onto the plate, then smoothed on the drawing and peeled it off. It dries pretty fast - in a matter of minutes in my 40% humidity studio. After collaging the images down I rubbed fairly hard on selected areas. There may be a tiny smear at the top of the drawing. And definitely one on the head of the skeleton. (the image will enlarge) But gentle rubbing doesn't produce smears.

Blogger will no longer notify people who have subscribed to blogs. If you would like to know when I publish a new post, send me your email address. In the text just say "subscribe" or some such. I'm not a robot and can understand most English. Send your email to judithDOTzDOThoffmanATgmailDOTcom. I do announce new posts on Facebook but I hardly look at the feed so you may not get notifications from me. 


Saturday, December 04, 2021

A finished book

Where are they now, Artist book by Judith Hoffman, paper, collage, paint
Where are they now? by Judith Hoffman, drum leaf accordion, Arches cover paper, collage, paint, ink. About 3 x 4 inches.

It's the same old story - I had a dozen pages left from a book I made years ago. I wanted to use them, and started playing with some mark making and collage. The dozen collaged pages seemed to divide into two themes, so two books. But I needed to make more pages so I could finish each book. I ended up making about 30 more pages. Both books are experiments with family photos. The photos are scanned and printed on an Epson SC-P700 printer, so it's supposed to be good ink.

Where are they now? Artist book Arches cover, collage, paint, ink by Judith Hoffman
Where are they now? First half of drum leaf accordion fold book.

Here is the first book - Where are they now? The other book is finished, but I have no photos to show you. I had to put my photo set up away last week to have some work done in the basement. They didn't show up, now they are coming next week. It's an odd coincidence that the title of this book fits the current problem with scheduling workers. Note: all photos will enlarge.

Artist book made of Arches Cover, collage, paint, ink by Judith Hoffman
Where are they now? Second half of drum leaf accordion fold book by Judith Hoffman

I am hugely enjoying the drum leaf accordion construction. I learned it from Andrew Huot earlier this year in an online class from Book Paper Thread called Books for Photographers and Printmakers. He is also teaching at FOBA this summer.

I will include some knitting news here - read on if you are so inclined. I needed some fingerless gloves for my cold hands. Looking through my yarn I found some almost finished ones I started years ago using yarn I spun myself. It's a thrill to spin yarn and then make something. As I finished knitting the gloves I got the urge to spin again. So another project has begun.

Finished fingerless mitts. Unknown fleece, sort of sock weight, chain plyed.

I never was that good at spinning, what I used to know has come back to me. Also all that I don't know. There are some good classes at Craftsy.

Mistakes and all here are some singles, the fleece is End of Innocence from Into the Whirled. It's lovely fleece.

See those tails sticking out of the singles on the left? Those are all mistakes. They may straighten out when I ply. Still it is relaxing most of the time. And I am delighted to be making yarn.

I hope you are doing well, keeping safe, and getting your booster. These are difficult times, it's good to find things to occupy your mind, other than the news. Thanks for reading and take care. 

Jude


Sunday, October 10, 2021

In Which Our Main Character Has a Revelation of Wonderment


In Which Our Main Character Has a Revelation of Wonderment, 2019, 5.75 x 4 x 1 inch. Materials: Eco dyed Bagasse paper, eco dyed linen thread, architect’s tracing paper, found papers, acrylic paint, ink. Techniques: eco dying, collage, drawing, rubber stamping. I took good photos a few months after finishing this, and then forgot to post them anywhere, so here they are at last.


I have had a few moments in my life when I felt connected to the universe, as if I could see everything all at once, and it all made sense. We can all have those moments, where we feel joy and are free from our daily worries and routine. It is, in a way, looking out at the world, seeing the beauty and reality without the overlay of our worries. But it's also looking in, seeing and feeling the space inside. I'm not saying life is always wonderful, because it's not. But allowing space for the good moments is important.


I enjoy the collage mixed with drawings, rubber stamping and the eco dyed marks. As I work I become absorbed in some internal story. On this page Benjamin Franklin is studying a huge moon. There had to be a small building to delineate the earth, and in the end I added a large stamp of a bird to have a weird change in sizes.


The pages are so wonky from the eco dye process it's hard to photograph the book. They also spring open however they want to.


When she saw this page, my friend Elise said "He is hoeing the earth and the mountains are growing. 


Here an amazing thing is happening just behind the photographer. He's so absorbed in his flower he doesn't notice.


Our life can be so amazing, and then suddenly it's over.