 |
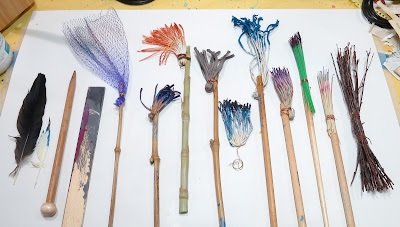
| 1. several feathers 2. large knitting needle 3. paint stick 4. vegetable netting 5. rubber bands 6. nylon string 7. shoe string 8. short cotton string 9. long cotton string 10. gardening twine 11. long green plastic broom straws 12. short tan plastic broom straws 13. tree branches |
In this post I will show you some of the handmade brushes I made as part of Jane Davies' Mark Making class, and also the marks some make. See my previous post for a summary of the class. And if you are interested in the question of awkwardness and balance in art, check out the thoughtful comments people left on my last blog post.
There is lots to think about and no one clear answer.
So now about the brushes (as usual all these images should enlarge):
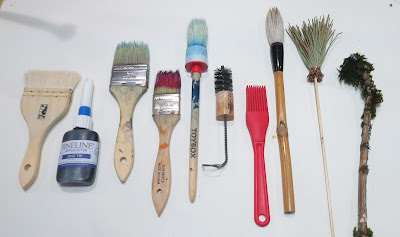 |
Most of these are clearly not handmade but I experimented with them to see what kinds of marks they would make. 1. goat hair brush 2. Fineline applicator 3. chip brush old but fairly clean 4. chip brush all stuck together 5. stencil brush 6. splatter tool 7. silicon basting brush 8. sumie brush 9. dried pine needles 10. moss on a stick.
|
 |
|
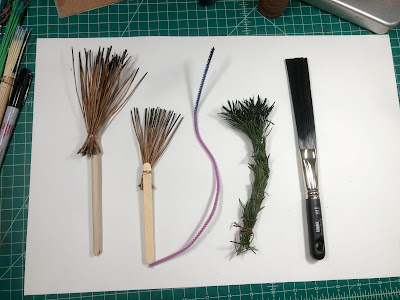
I forgot to include these brushes in the first photo. 1. long pine needles 2. short pine needles 3. pipe cleaner (chenille stick?) 4. three Douglas fir branches tied together. 5. splatter stick from Dick Blick.
|
I won't post all the tests I did, I have stacks of paper with marks. In general for me, the string and twig brushes make the best marks. I like a brush that holds a fair amount of ink or paint. (I used high flow acrylic paint for my tests - drawing ink would also work). I love the big splats and small splatters most of these brushes make - they are so dynamic. There is also an element of surprise, although practice helps to get marks in the right place, more or less. The main thing I gained from all this testing is to find that I love the process of mark making and I am now more aware of contrasts between marks, shapes, size, etc. Because of this new awaeness, I think this was a worthwhile way to spend a month. There are marks I really like and marks that leave me cold, but none are completely terrible. I am already cutting or tearing up these papers to use bits in collage.
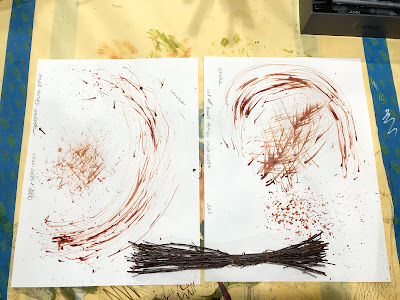 |
| A bundle of sticks. Tied in two places to make a long and short brush. I keep thinking different lengths would make different marks, but they don't make much difference. The sticks are slender so they make a nice scratchy mark, but don't hold a lot of paint. |
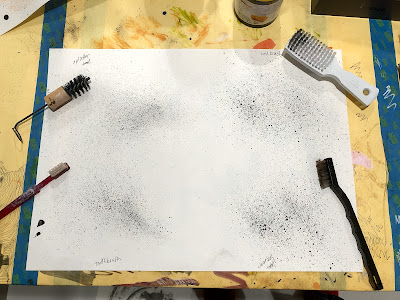 |
| I will include some commercial brushes because all this mark making inspired me to get out some brushes I have had for years and see what they can do. I love these little sprays of paint, I wanted to test the different sizes. My favorite for texture and size is the scrubbing brush, lower right. Upper left is a splatter tool, I think you can get one at Dick Blick. The toothbrush is an antique - it's flat and makes a nice small splatter. |
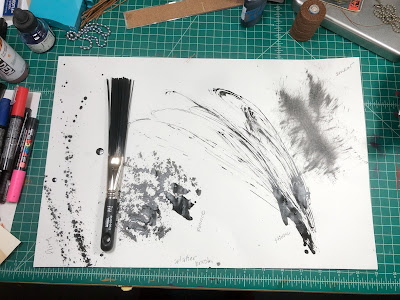 |
| This is a splatter brush from Dick Blick - it holds a ton of paint and makes a huge splat. It can also be used like a toothbrush, running your finger across the ends of the brush. Or scrub with it for other marks. A horizontal fling makes a splatter that has a lot of direction. |
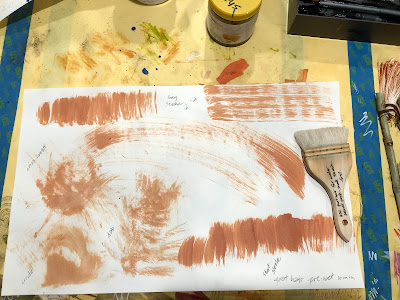 |
This goat hair brush is very soft - I bought it for paste papers. I didn't expect it to be interesting because I tend to like stiff brushes, but I do like the wide dry brush marks. When ever I spend a lot on a brush I write the price on it, so I don't do some dumb thing like scrub some paint into coarse paper. (It says $32. goat hair for water based paste. Soak 30 minutes first.)
I can't add a caption to the image above - I just had to include it. The grey swoosh was made with a paint stirring stick on it's side, drug though a little house paint. The ecru drips are house paint drips. This is one of my favorite from the whole month.
Take care, be good. And definitely be well.
|


4 comments:
So cool. I like how scientifically you work.
Thanks Eileen! I supposed it does seem scientific since it's documented. For me it's a big mess all over. And while I'm trying one thing, I think what about that dried up brush? Or a different string. So then I'm off on to another tangent. (-:
You always are doing the most interesting things,
Thank you! That’s so nice to hear.
Post a Comment